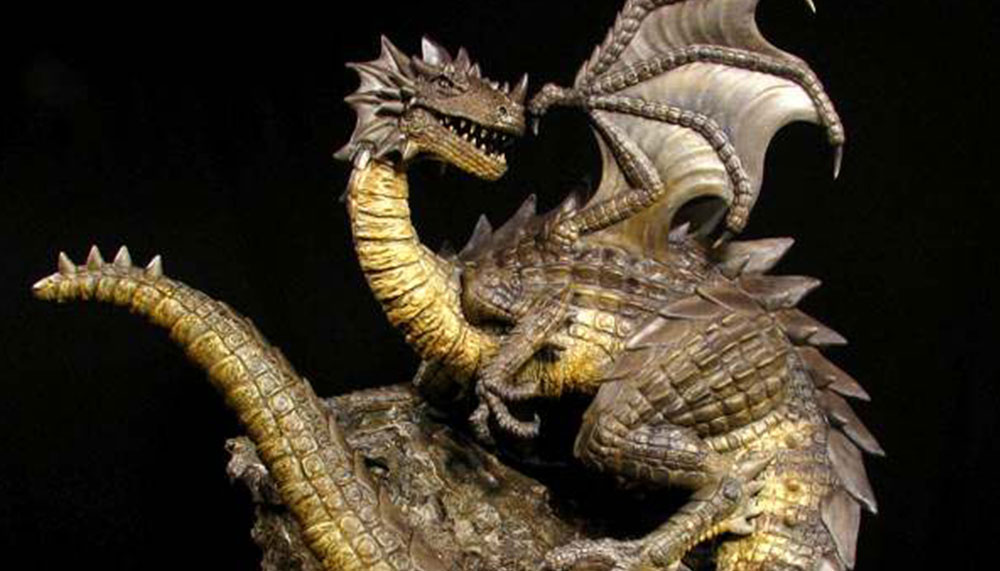
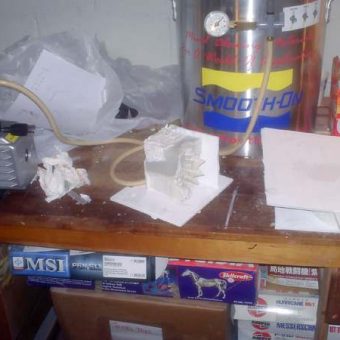
Many people inquire as to how I create Dragons. This is a step-by-step tutorial showing the creation of Vargas the Stone Tyrant over a period of five months.
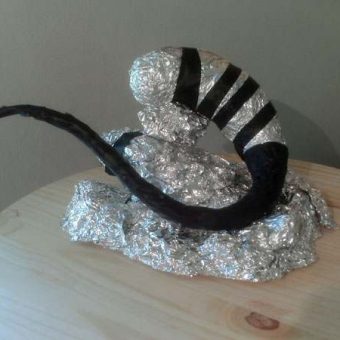
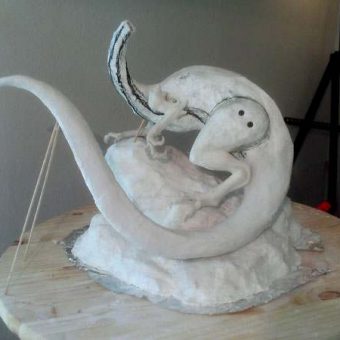
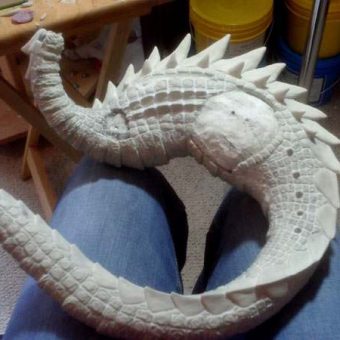
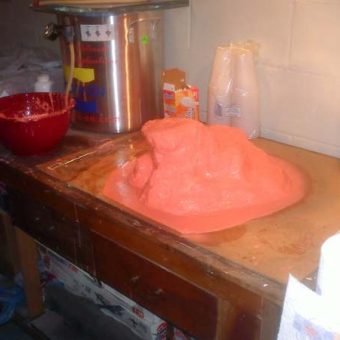
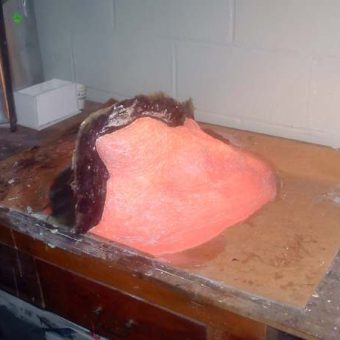
It begins with Aluminum foil shaped into the basic form of the base that the Dragon will occupy. Aluminum foil creates the form of the body and tail, which are then fastened with electrical tape and balanced in position on the base.
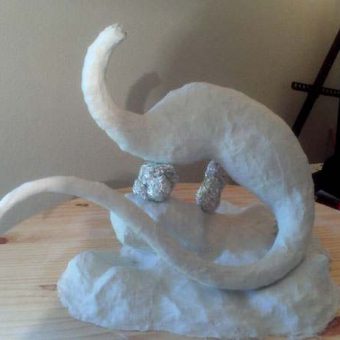
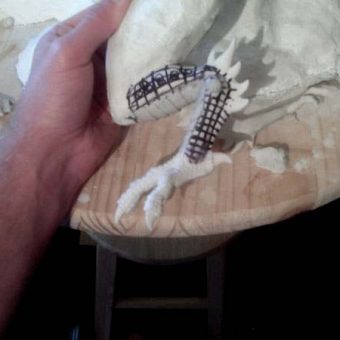
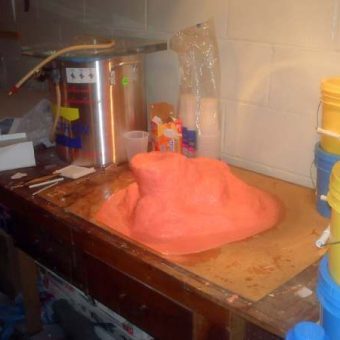
The neck is added. The entire form is covered in plaster cloth, solidifying the basic structure that will become the base and body of the Dragon.
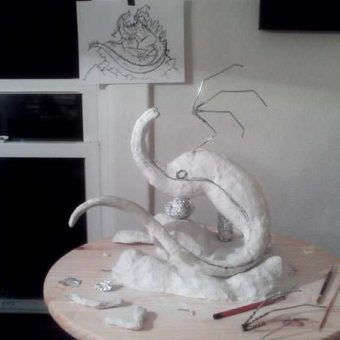
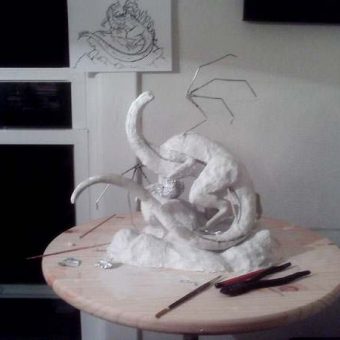
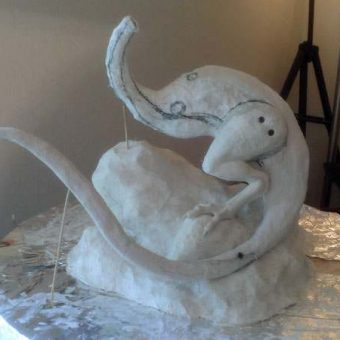
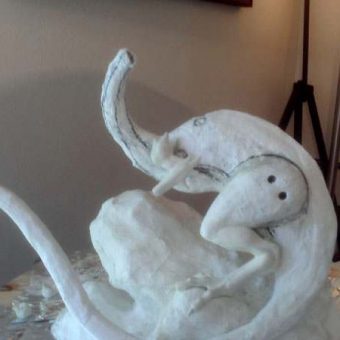
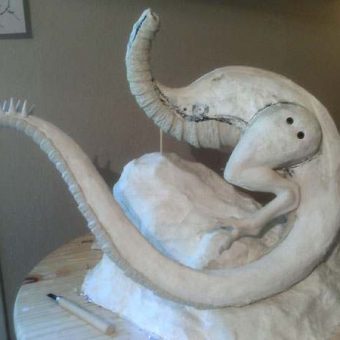
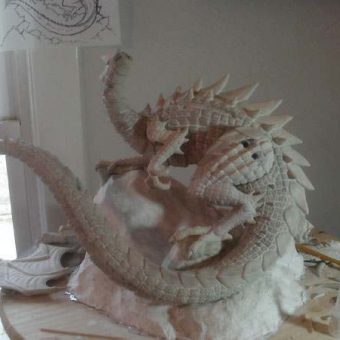
Here, the dividing lines for the plates that run along the Dragon’s underside are drawn, and a skeleton for one of the wings is crafted from aluminum wire and put into place. The fingers of the wings are fixed in place with Aves Fixit- Sculpt and left to cure.
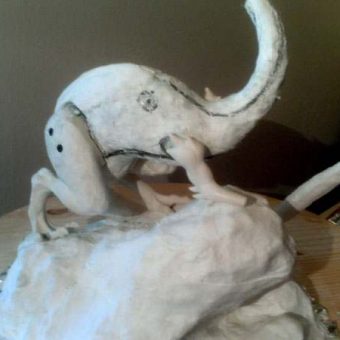
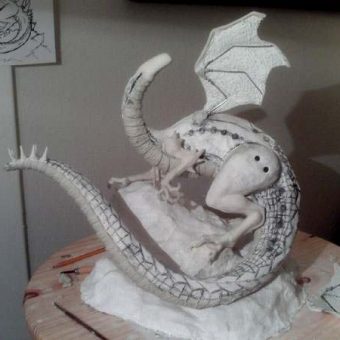
Another skeletal wing is added. In the sculpture’s final form, this wing was discarded and replaced with one that was more compositionally pleasing. Structural arms and legs are also added in this step. Aves Fixit-Sculpt is used to form the muscles in the Dragon’s lower leg.
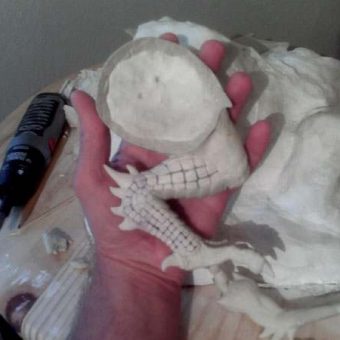
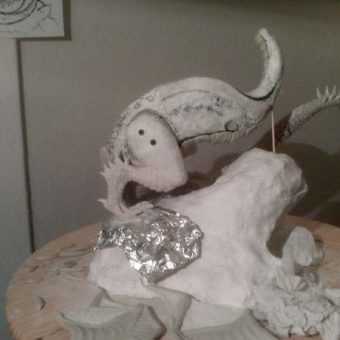
The legs are further fleshed out with plasticine clay and plaster cloth, and pins are put into place that allow them to stay firmly attached to the body, yet retain the ability to be removed so they can be worked on separately. An early head made of polymer clay was placed on the piece just for fun.
Here, the leg on the opposing side is given the same treatment. Using Fixit-sculpt as a muscle layer gives the entire sculpture the strength it requires to stand in place without falling apart while it is created.
By this time, I had realized that I was not fond of the Dragon’s tail. Though it had generally the correct curve, it was not heavy enough for the piece, and it also presented logistical problems to where the Dragon’s foot needed to grasp the rocks. So, off the tail came! This allowed for proper placement of the Dragon’s left foot.
The new tail was put in place and solidified with Fixit-Sculpt, and a removable fastener between it and the base helped stabilize the piece while other areas were worked on. A foot began to be formed from Fixit-Sculpt. It is nice using this material to make claws since it will not easily break during handling. I used to use polymer clay for structure and claws, which resulted in going through a ton of super glue and a lot of headaches every time they broke.
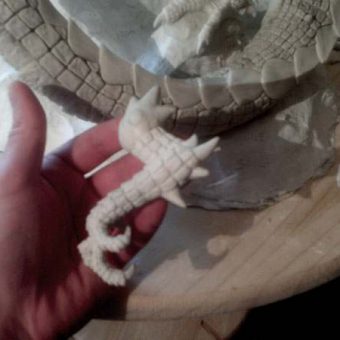
New skeletal arms were added and posed correctly. The arms are fleshed out with Fixit-Sculpt, muscle and spikes added…
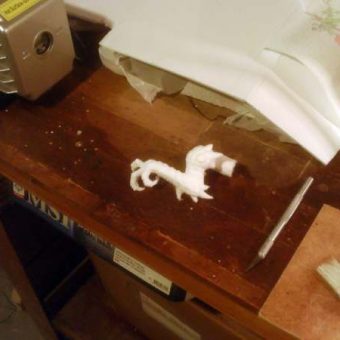
The first hand is crafted, ready to be grafted onto the left arm.
Muscles added to the other arm as well, and a shot of the Dragon’s right foot which was sculpted at the same time as the other one.
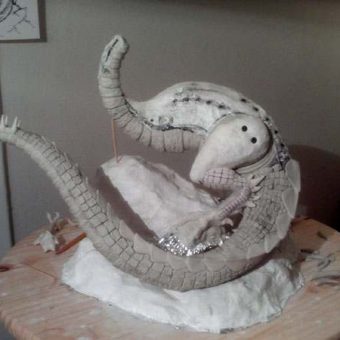
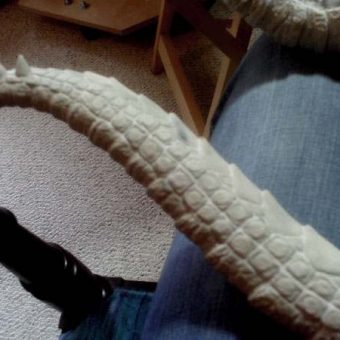
The new tail is fleshed out with aluminum foil and plasticine clay, and covered with plaster cloth to solidify the form. The hands are also grafted onto the arms using Fixit-Sculpt.
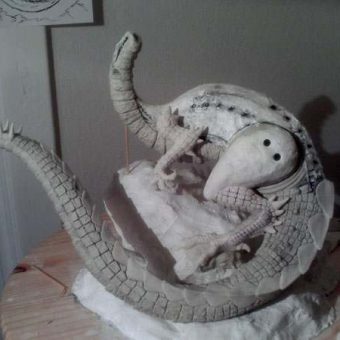
Plates are added to the Dragon’s underside with Fixit-Sculpt. The detail is worked in with rubber stamps made from rocks and a lot of brushwork. Placeholders of polymer clay are put in to represent where the spikes on the end of the tail will eventually go.
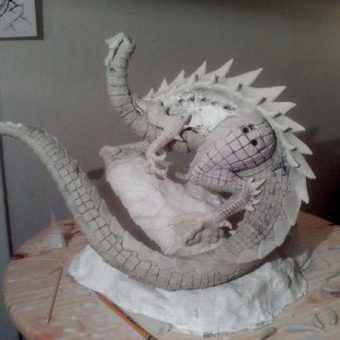
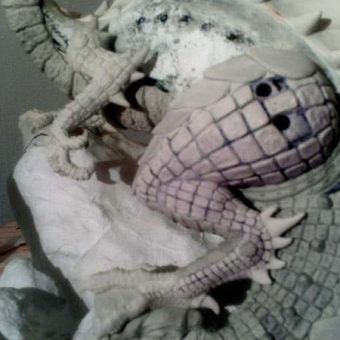
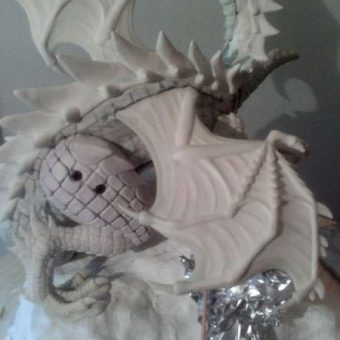
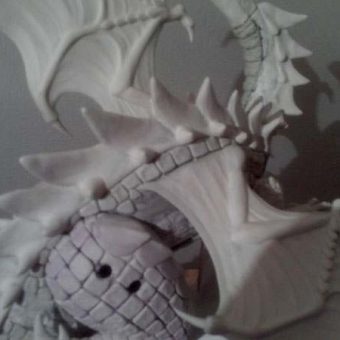
Plaster cloth is used to begin forming the skin that stretches between the wing fingers, and the scale / armor pattern on the body and tail are laid out. A placeholder is used for the creature’s head.
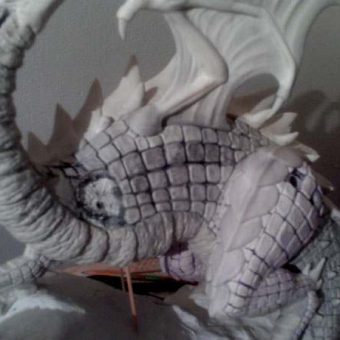
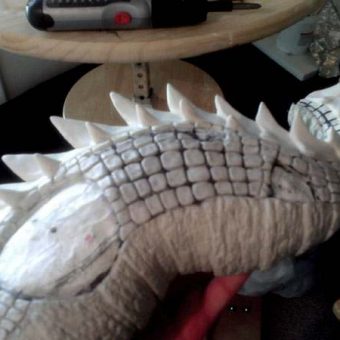
The Dragon’s armor-plated skin begins to be placed, scale by scale and plate by plate. The spaces left between them will eventually be slightly filled with grout so that the scales and ridges appear to grow naturally from the Dragon’s skin. These scales are created step-by- step with Aves Fixit-Sculpt, following the pattern I drew on the understructure of the sculpted form.
Detail begins to be put into the legs. Every one of the armor plates and scales is put into place by hand and brush.
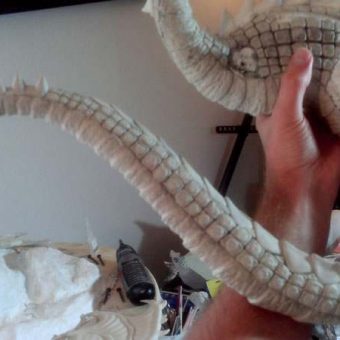
Scales are worked up the leg. For this step I used polymer clay over Fixit-Sculpt. When I sculpt some areas of detail, I often have to put my hand into places I have just sculpted detail. Using polymer clay in these instances allows me to quickly solidify detail I have just sculpted with a heat gun, allowing me to then hold the piece without ruining detail I have just finished. These areas have to be handled very gently afterward, as polymer clay is not nearly as durable as Fixit- Sculpt. The lower leg detailing is further completed.
Detail on the other side of the leg. Just because a part of the sculpture is not easily seen does not mean that it is acceptable to skimp on detail.
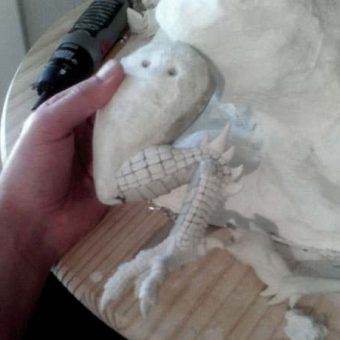
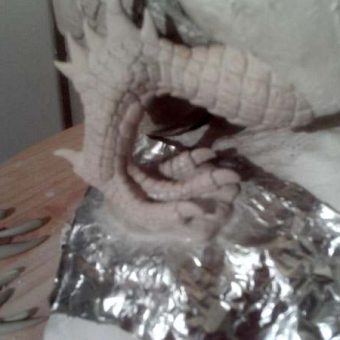
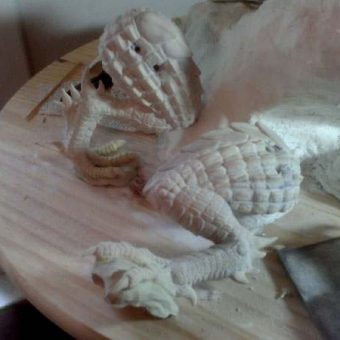
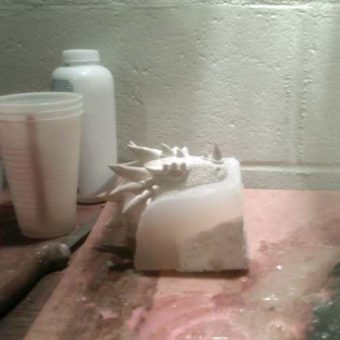
The feet are sculpted onto rocks that can detach from the base. These rock forms and made of Aves Fixit-Sculpt. This is a design feature that will allow the piece to be more easily molded and leave less chance for casting flaws on the feet.
The same process is done to the foot on the other side. Aluminum foil is used as a separator between the Fixit-Sculpt and the plaster cloth base. When the Fixit-Sculpt cures, the aluminum foil is removed and allows the foot to come off the base. Without the separator, the Fixit-Sculpt would join with the base and the foot would not come off of it for further detailing.
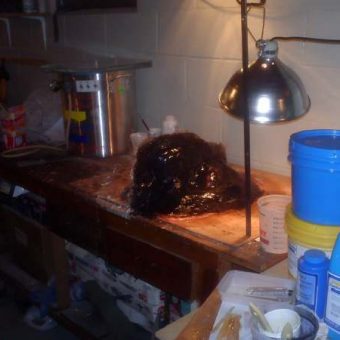
Here is a closer view of the foot being sculpted onto the rocks with Fixit-Sculpt. Unfortunately the lighting in here isn’t always the greatest, so getting crisp photographs of my work in progress is sometimes as big of a challenge as creating the work itself…
Detailing is being completed on the left arm and hand, using polymer clay over Fixit-Sculpt.
Here is a shot of the sculpture with the detailed arm in place. It can take upwards of a day to detail one small appendage. Detailing the body completely took a few weeks.
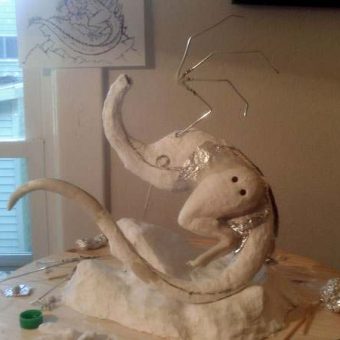
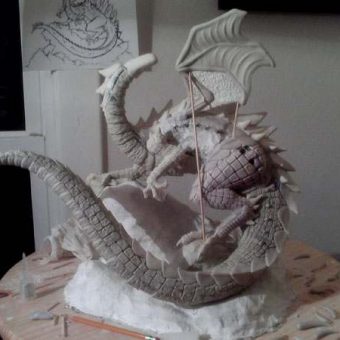
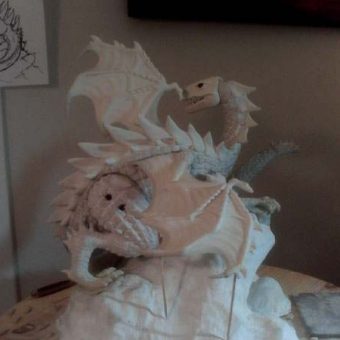
The great spikes are added to the Dragon’s back. As you may have noticed from the preliminary sketch of the Dragon that hangs on the wall behind the work in progress, these spikes are different than what was originally drawn. Sometimes when I am in mid-sculpture I realize that the piece really should look different than what the original concept sketch told me it should look like. This is why I do not do very complex concept sketches before I begin work, as many times I enjoy the excitement of sculpting “on the fly” much more than following.
The thigh scales are roughed in. I had to leave some spaces blank until the very end, as I needed to be able to take the leg off and put it back on with the leg screws repeatedly until the sculpture was 97% completed. These empty spots were filled in just prior to the molding and casting stage.
The thigh on the opposite side is detailed, and the spikes on the Dragon’s back are displayed. A closer view of the work completed on the right leg. The ridges on the large scales still need to be put in place.
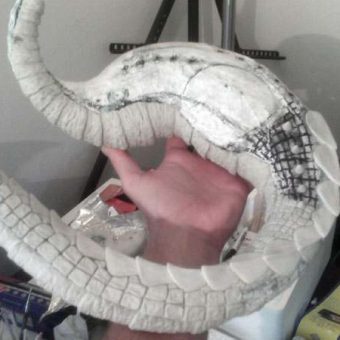
With the detail worked in to the appendages, the skin starts to be stretched between the wing fingers with Fixit-Sculpt. Since the wings need to remain thin, it is important to use materials that will not easily break.
The wing is further detailed, and held in place with a spike so it can be removed and put back in the same place multiple times. This makes working detail into pieces much easier, and allows access to areas that would otherwise be blocked by the piece that needs to be removed. It also makes molding and casting easier, as replicating sculptures in multiple pieces is much less complex than trying to mold and cast a sculpture in its entirety.
Work begins on a replacement right wing. The first one just didn’t cut it, so it was discarded and replaced with this one. The right wing detailed with Fixit-Sculpt, “just like that!” In reality, this step took three days…
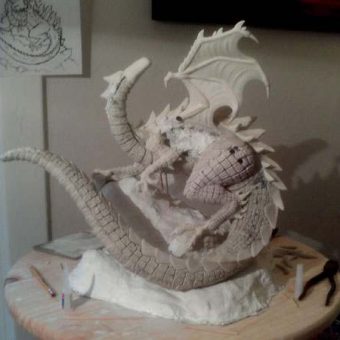
In this picture, the wings have been sculpted down into the body where the skin stretches and attaches to the back. Vargas, being an Earth Dragon, has only small vestigial wings growing from his back. Not much need to fly around in caves that are deep underground… Also, the detail for his main body has been laid out in pencil on his sides.
The armor plates begin to appear on the sides of the great Dragon. These are made of Aves Fixit- Sculpt. Here the plates are in place, waiting for the ridges on them to be sculpted next.
Plates run up the Dragon’s back, and the skin from the wings attach to the body underneath them…
Plates made of Fixit-Sculpt are placed on the right side of the Dragon as well – though they will be well-hidden from view by the Dragon’s right wing, it is still important that they are sculpted in full detail.
Detail is added to the plates on the Dragon’s mighty tail with Aves Fixit-Sculpt. The final spikes are sculpted out of Fixit-Sculpt onto the end of the creature’s tail. A terrible weapon for any on the receiving end of a tail lash from this beast!
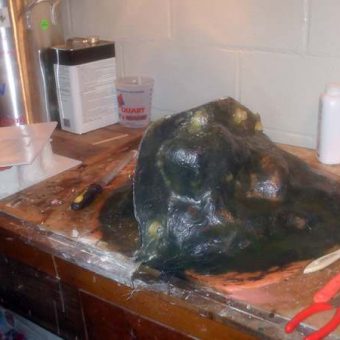
The ridges are added to the legs of the Dragon, and they are grouted with drywall compound in order to pull the detail together and finalize the sculpting on the legs.
Grout is applied to the tail. The appearance of armor plates growing out of skin is convincing.
The ridges, made with Fixit-Sculpt, are added to the plates on the Dragon’s sides, and grout is applied to the armor over Vargas’ entire body.
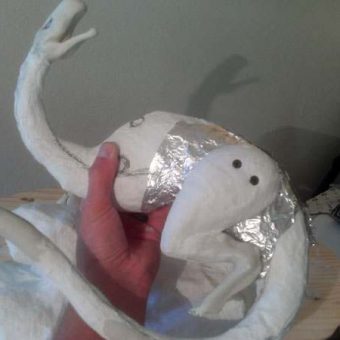
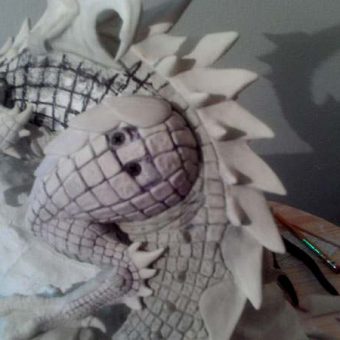
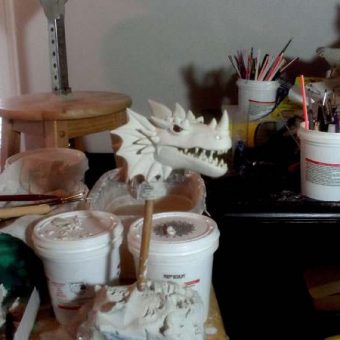
Now the piece is really starting to come together. Time to complete the most important part of the piece – the Dragon’s head…
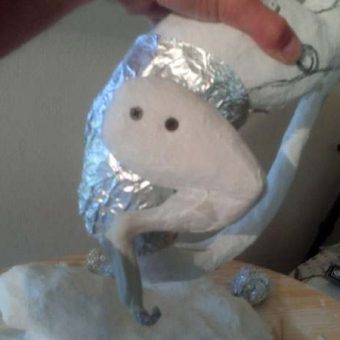
The Dragon’s wing replaced and detail worked into the wing’s shoulder joint… Vargas’ head starts to take shape.
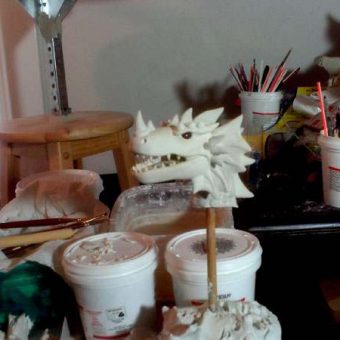
I did not take many in-progress photos of working on his head. Some things have to be left mysterious, you know… Here the fins are added to the sides of his head, and his horns are put in place.
This is as close as you will ever come to seeing me sculpt a Dragon’s head on a spike. Removing it makes it much easier to put detail into his face – it is a very delicate and time-consuming process.
The other side of the Dragon’s head, prior to detailing. I took photos of the “after” detailing in this manner as well, but sadly they did not turn out. You will see his fully-detailed head in upcoming photographs, though.
Vargas, with his head fully detailed and back where it’s supposed to be.
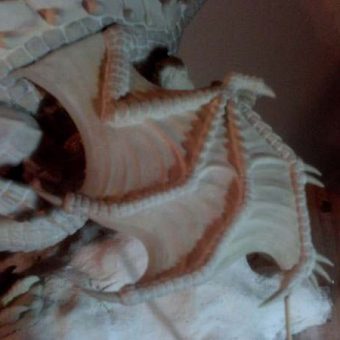
Scale detail worked into each of his wing fingers. This step took a mind-numbingly long time. The final result is always well worth the time involved in the process.
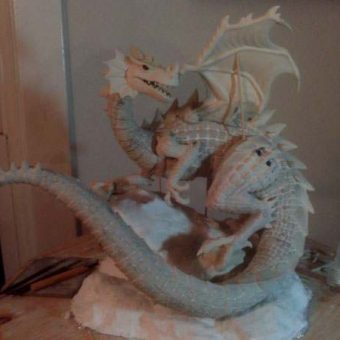
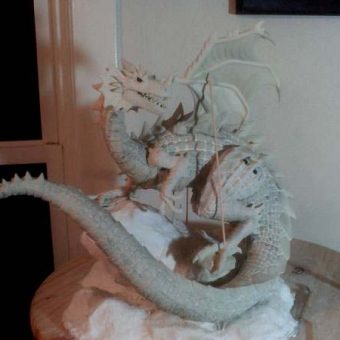
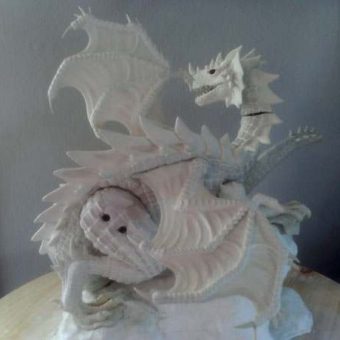
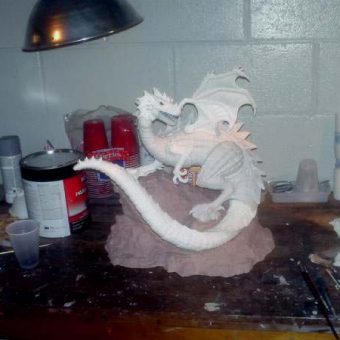
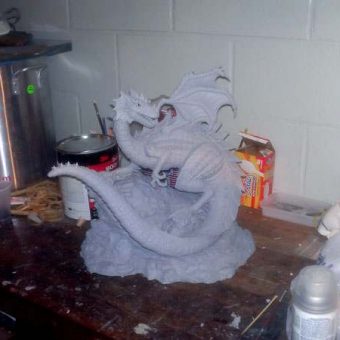
The lighting was better the next day, so I took some photos of the Dragon that turned out a bit better. Here the Dragon is fully fleshed out and detailed. The final seams will disappear after he is molded, cast, and sculpted back together into his final form.
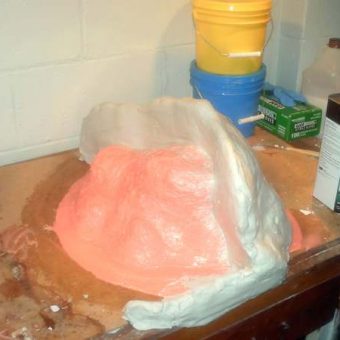
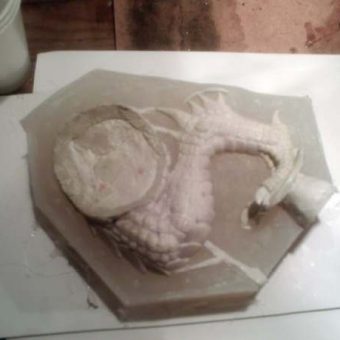
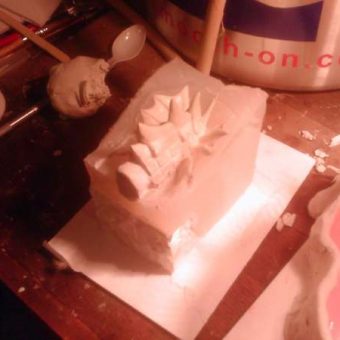
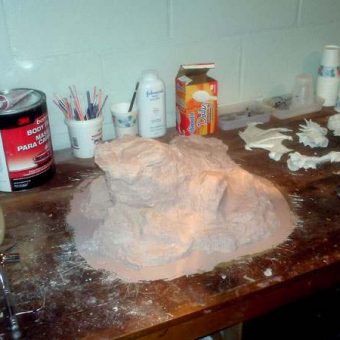
Here is the Dragon, prior to sculpting the detail into his base.
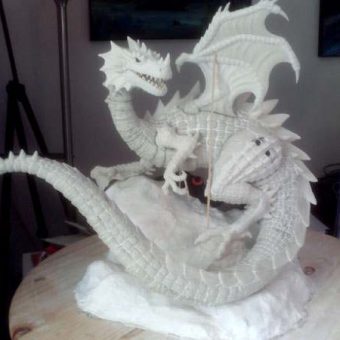
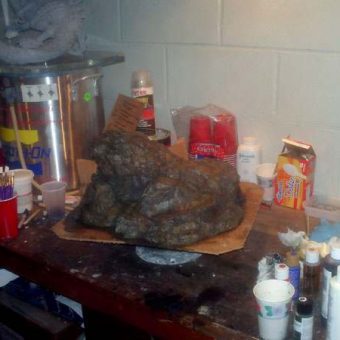
Though it took a long time, I did not document the entire base-detailing process. Here you see the results of working rough rock detail into the whole base that the Earth Dragon stands on.
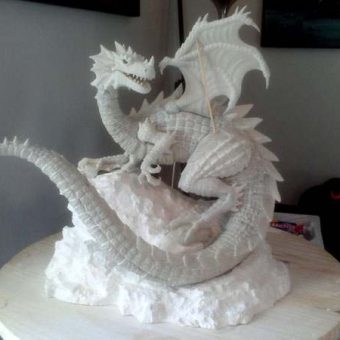
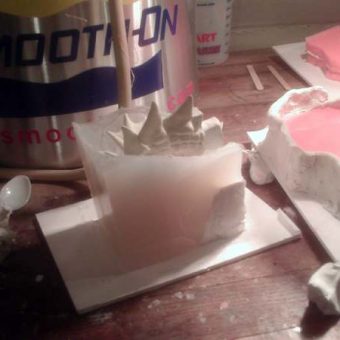
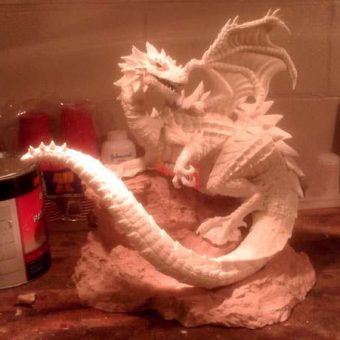
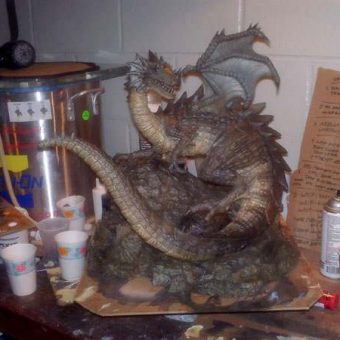
Vargas the Stone Tyrant in all his glory prior to molding and casting. Everything up to this point took three months. The main materials used were aluminum foil, aluminum and floral wire, plaster cloth, plasticine clay, Aves fixit-Sculpt, polymer clay, and drywall compound.
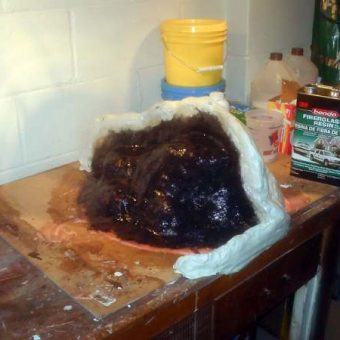
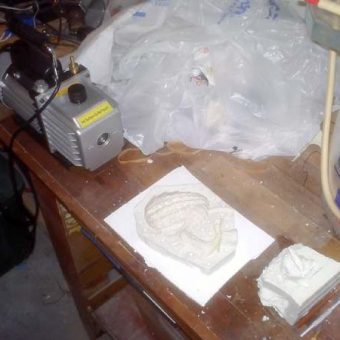
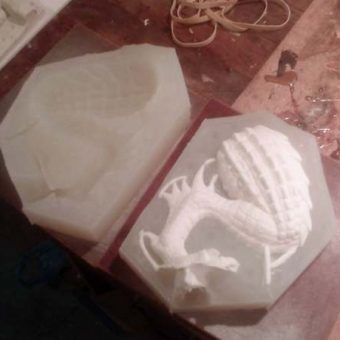
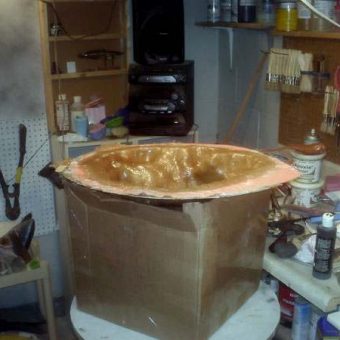
The Dragon is disassembled and taken to the replication studio. Here the first of three layers of brush-on silicone rubber is applied to the Dragon’s base.
Another layer is applied over the first, to thicken and strengthen the rubber mold. A thickening agent is added to the silicone to make it stick to vertical surfaces and not run off onto the floor.
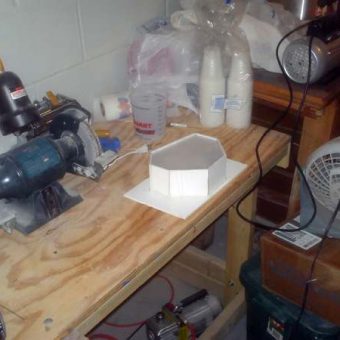
The rubber mold is complete, and now a shell must be placed on it to insure it will keep its shape after the material underneath it is removed.
In this shot, a wall is built on one-half of the cured rubber mold, to facilitate building a two- part mother mold.
The first layer of the fiberglass mother mold is applied to one half of the base. It must be applied in halves, or sections, because one solid mother mold would not be able to flex to allow the rubber mold underneath it to come out. The mother mold is a rigid shell that will hold the rubber mold in the exact place it needs to be in order to get a perfect casting from it.
One half of the fiberglass mother mold is complete, and the wall is removed. Release agent is applied to the joint where the second half will meet the first half. When the second half is complete, the release agent will insure the two halves will separate instead of bonding together, which would trap the rubber mold inside the shell and be a disaster…
The second half of the fiberglass mother mold is applied to the base. Black die is added to the fiberglass to make it easier to see where it has been placed and insure proper coverage – as fiberglass resin is otherwise translucent amber in color.
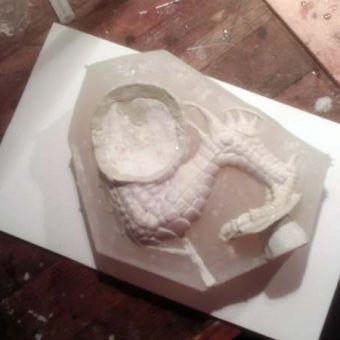
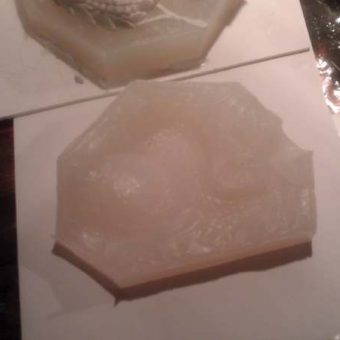
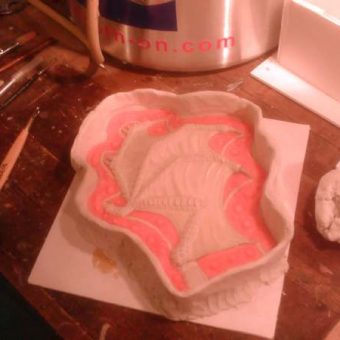
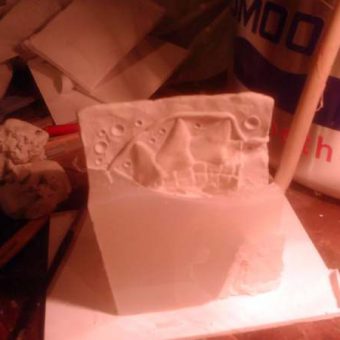
The mother mold is completed and registration holes added along the joint. These are in place to allow the two halves to be locked together with bolts and nuts, so the shell lines up exactly and stays in place around the rubber mold it cradles. The base will be revisited later in this demonstration.
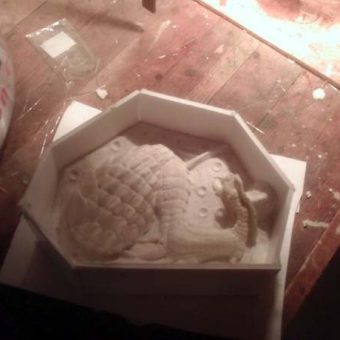
A box is built and a dam separates Vargas’ left arm into halves. The dents in the clay wall insure that the rubber mold poured around the arm will have proper registration.
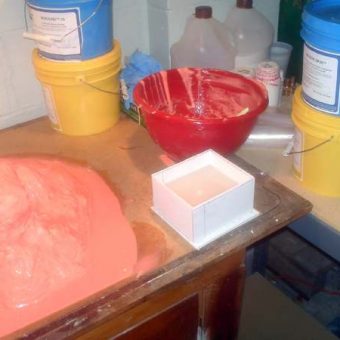
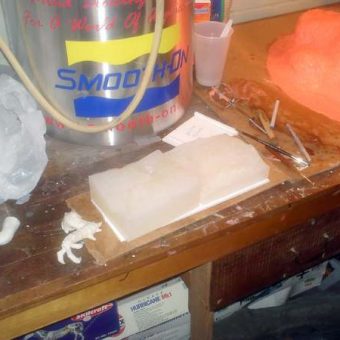
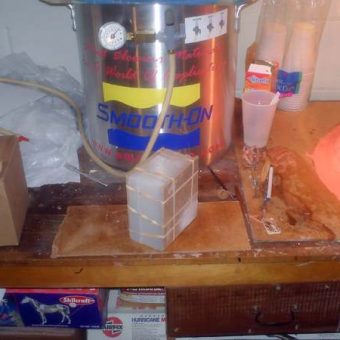
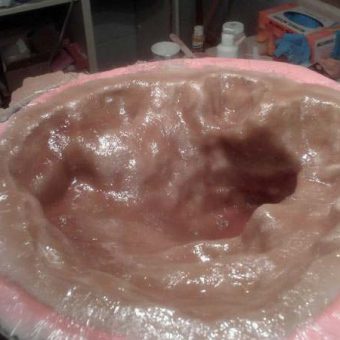
Platinum cure silicone rubber is poured into the box to make a mold of the left arm. The silicone is mixed up and then placed in the vacuum chamber that can be seen in many of these shots. The vacuum chamber takes most of the air out of the liquid rubber, so that air pockets and bubbles do not become trapped in the mold. This would weaken the mold and cause casting flaws.
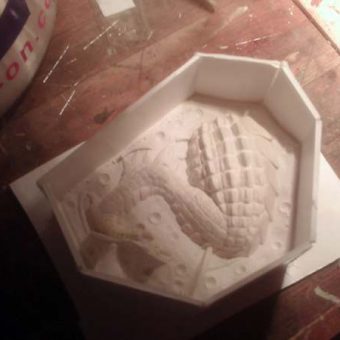
After the silicone cures, the half-molded piece is taken out of the box, and the dam is removed from it. Then a box is rebuilt around it, release agent is applied to the silicone, and the other half of the mold is poured. In this picture both arm molds are shown after pouring. The arm is completely encased in rubber, except for an access point where resin will be poured into the mold.
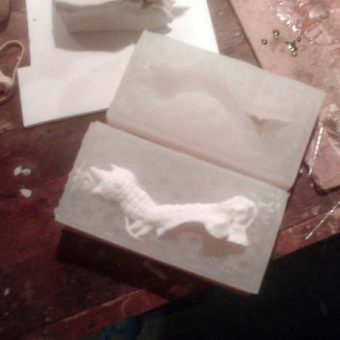
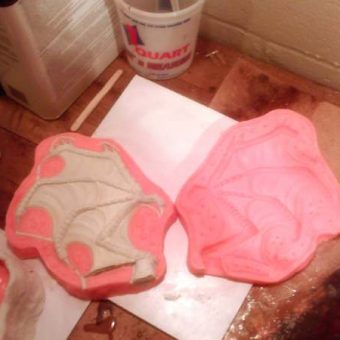
The rubber mold is opened and the piece inside removed… This leaves a two part mold with flawless detail captured inside of it, ready to make replicas of the original piece.
Masonite boards are cut to size and placed on both halves of the two part mold which has been reassembled. Rubber bands hold the mold snugly in place. Using rigid boards on the outside of the mold insures that the rubber bands do not distort the rubber mold, which would cause the parts to cast incorrectly. High-quality resin is now mixed with porcelain or glass powder to fill the mold and replicate the part that it was made around.
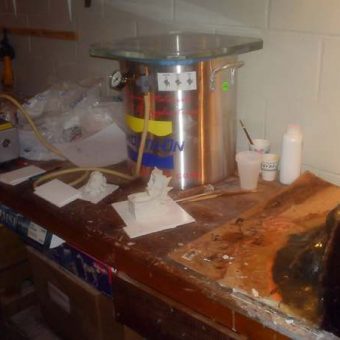
This is my pressure chamber, an expensive but necessary and marvelous piece of equipment. Inside of it, the filled mold is placed and subjected to 60-70 PSI, which pressurizes the material inside of the mold, making it incredibly strong and dense, and crushes any air bubbles trapped inside the mold to miniscule, non- detectable sizes. The chamber helps greatly in producing flawless parts that are true to the original piece in every way. It drastically cuts down on rework and clean-up time, which saves time and money.
After a ride inside the pressure chamber, the piece is de-molded, and a near-flawless casting is produced, which requires the vents and cup to be cut off and the small seams sanded away to become ready for the next step…
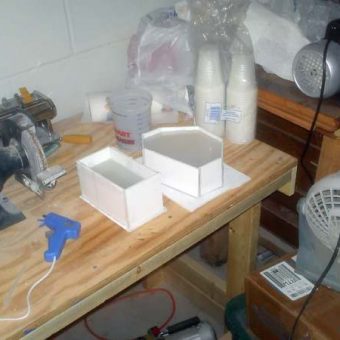
The preparation begins to mold the Dragon’s legs. This mold will be a different kind of box mold, where the vertical foam core walls are not a simple rectangular box – building a rectangular box around a piece this shape would result in a large waste of expensive silicone, so to cut down on the amount required, the mold is built in a custom shape around the dam that separates the leg into halves. The piece of equipment shown in this photo is the vacuum pump, which attaches to the vacuum chamber that degasses the silicone.
Vargas’ right leg, with the dam built around it so a two-part mold can be produced. The foam core wall is built around the dam, to create a chamber that will hold the liquid rubber until it cures around the piece.
Another shot of the leg. It is ready for the first half of the mold to be applied. Note the vents that have been added – these will be pathways for air to escape, which would otherwise be trapped in the mold. The pressure chamber crushes small air bubbles, but large ones will still cause casting flaws. The air must have a pathway out to make the mold work at an optimum level.
After a trip in the vacuum chamber, silicone is poured over the leg and allowed to cure, which takes several hours. The mold is opened and the original piece revealed.
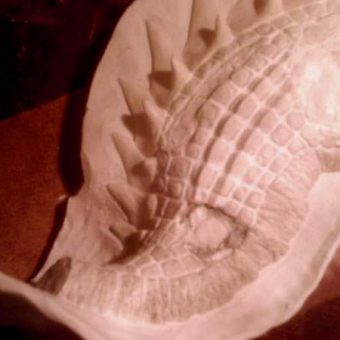
A close-up shot of what the original piece looks like inside the mold.
The environmental conditions have to be correct, and the silicone must be mixed properly and at the correct ratio, or during these stages the entire sculpture can be lost. If the rubber fails to set up, months of work can be lost just like that…
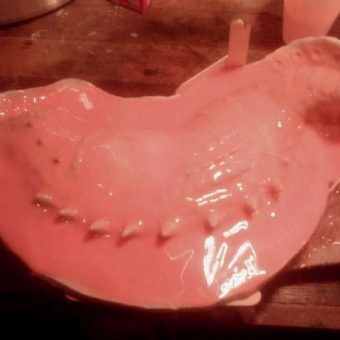
After casting, the arm mold is opened and the replicated piece revealed.
Back to the mold of the right leg, the original sculpture is ready to come out of the mold.
A shot of what the mold looks like without a piece inside of it. Details are captured perfectly without air bubbles marring the surface.
The mold is filled, placed in the pressure chamber, and then the mold is opened, revealing the replicated leg inside. This process takes about one hour.
Another shot of the replicated leg inside the mold. It is identical to the original in every way, but is more solid and durable than the original piece, which was made from impermanent materials.
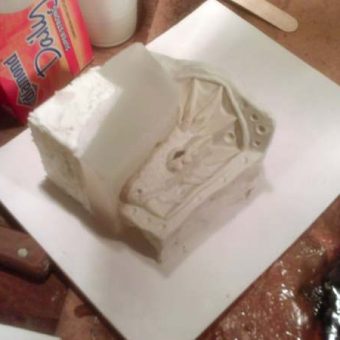
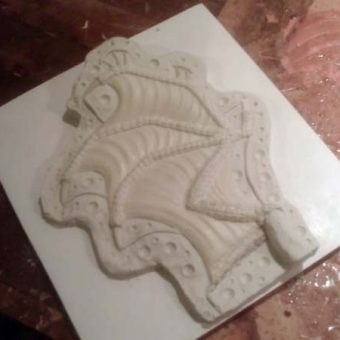
The complicated mold begins to be made of the Dragon’s head. Because of the complexity of the piece and the inability to cut the head into many separate parts, a multiple-part mold must be made of the entire head. First the Dragon’s lower jaw was removed and molded separately and the remainder must be completed in 5 separate mold parts. If this were not done, the head would become trapped inside of the mold with no way to get it out.
Here the in-progress mold of the head is prepared for another part of the mold to be poured.
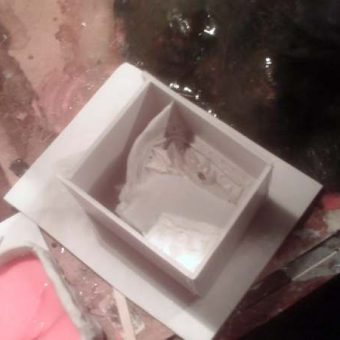
The mold is completed on the underside of the Dragon’s head. Note that the eyes were removed from the inside – the head was hollowed out after the bottom jaw was removed, and the eyes taken out from the inside. This will allow the head to be cast with a hollow chamber inside of it, allowing the semiprecious stone eyes to be placed in each of the cast heads. Without this step, the Dragon would not be able to have its beautiful gemstone eyes.
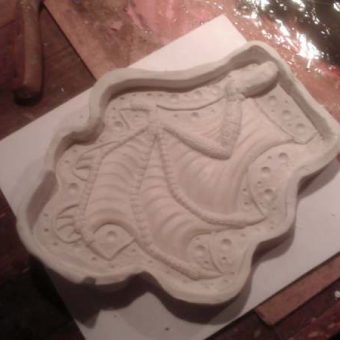
The Dragon’s head is laid on its side, and a dam built to divide the remainder in half. Because the fins on the back of the Dragon’s head would become impossible undercuts, separate pieces of the mold are created for them as well. When complete, this mold will separate into 5 parts, which are then reassembled inside another silicone sleeve with masonite walls to hold the entire structure in registration while the new heads are cast.
The walls are put up around the head to hold the liquid rubber as it cures around the head. This mold will be revisited later.
The molds are begun for the Dragon’s wings. Here a dam is put in place to divide the wing into two halves. The dam is completed, with registration marks, vents, and the pour spout put into place.
A clay wall is built around the dam, since building a rectangular box around the wing with masonite would result in wasting a LOT of silicone… Here the wing is ready for pouring the first half of the mold around it.
After the rubber cures, the clay wall and dam are removed, and the second half is prepared for pouring.
A good in-process shot. Here you can see one wing with the clay wall being constructed around it so the second half of its mold can be poured, and the other wing which has had the process done to it already – its rubber mold is complete.
The wall is being built around the wing to hold the silicone that will become the second half of the mold. The wall is complete, and the second half is ready for pouring.
After the mold is complete, it is opened and you can see the detail has been captured flawlessly. Once the original is removed and the mold cleaned up, this mold will be ready for casting.
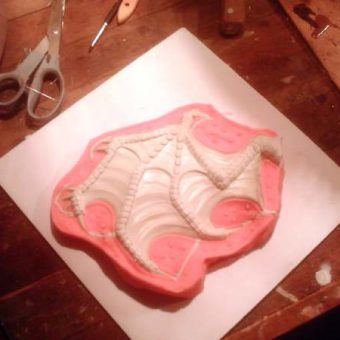
The head is shown with the two front halves poured, ready to have the dam built which will separate the back of the head into two parts as well.
The head imbedded in silicone. The entire process seems overwhelming at first, but when it is laid out as a series of steps and followed diligently, things fall into place. Problem solving – sometimes very complicated problem solving – is a part of my work on a daily basis.
The wall is begun that will separate the back half of the head into two parts. A close-up of the completed dam. Now a wall will be constructed to hold the silicone in place. When it cures, the wall and dam are removed, the silicone is cleaned and a release agent applied. Then a final wall is constructed and the final piece of the mold is poured, encasing the head completely in rubber that disassembles to allow the part inside of it to be removed.
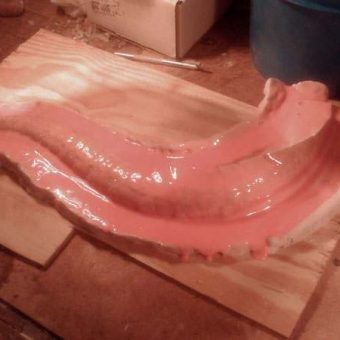
The tail is prepared for molding. A wall is built to separate it into halves. The first layer of brush-on silicone is applied to the tail. It is too big to go in the pressure chamber, so a different type of mold is built for it – one that will have the resin roto-cast inside of it instead of pressure cast. This means that instead of using pressure to eliminate air bubbles, I will pour a small amount of resin into this completed mold and then slosh it around inside the mold until it sets up, capturing all the detail inside the mold. Then the hollow tail will have a hole drilled in it and be filled completely with resin the rest of the way.
More layers of silicone are added to the mold. This strengthens the mold and ensures it can stand up to multiple castings without degrading.
The same process used on the tail is begun with the main part of the Dragon’s body. Here a wall is built to divide the body in half.
Building large dams is difficult and time- consuming. The entire molding process on all the parts of a complete sculpture can take more than a month of long days to complete.
The body is prepared to receive a layer of brush- on silicone rubber. The first layer of brush-on silicone rubber is applied to the Dragon’s body. This is a critical step – if the silicone is not applied correctly, detail may be lost that takes a very long time to rebuild. Also, I am a notorious perfectionist, and the final castings must be identical in every way to the original piece or I will not be satisfied.
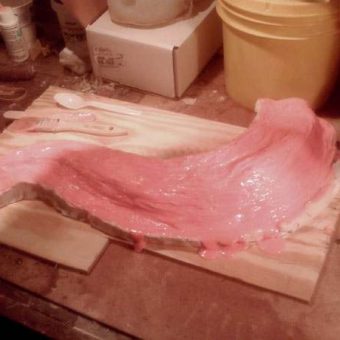
Here the completed tail mold is opened to reveal the detail inside. Before the mold was taken apart, a fiberglass mother mold was made on both sides of the rubber mold to insure it goes back into registration properly.
The body of the Dragon is completely encased in silicone, ready for a fiberglass mother mold to be created on it. The mother mold is put into place on the rubber mold that encases the Dragon’s body. You can already see castings made from the other molds laid out on the table next to the mold of the body.
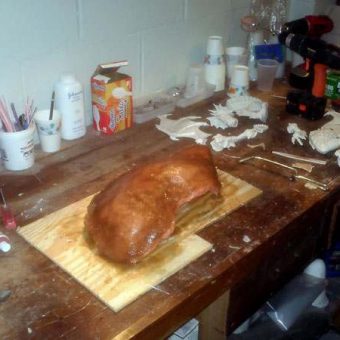
The base is cast inside of the silicone mold made at the beginning of this demonstration. This is a difficult, time consuming process. The base is a hollow form, constructed from polyester resin that must be brushed into the mold in layers and strengthened with fiberglass. The base must be a hollow form, otherwise the already weighty sculpture would be unbearably heavy and extremely wasteful in very expensive materials.
A shot of the base being cast. The mold is placed upside down in a cardboard box to support it while it is being worked on.
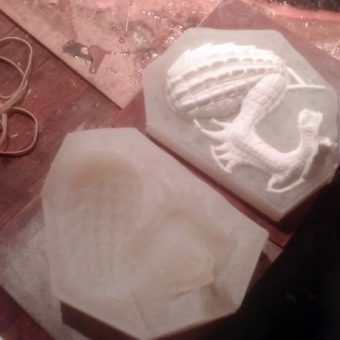
The base is pulled from the silicone mold, ready to have the flashing removed and the solid bottom grafted into place.
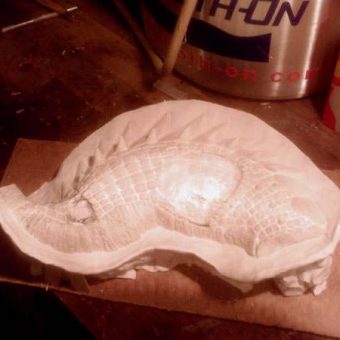
Back to the body, which has been roto-cast and pulled from the mold, as flawless as the original (except for the seams, which are cleaned up and completely undetectable in the final piece.)
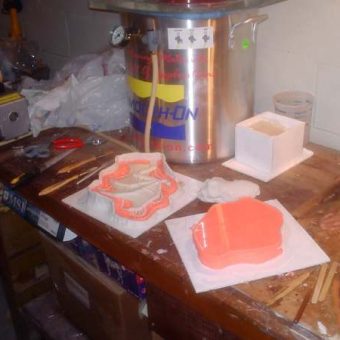
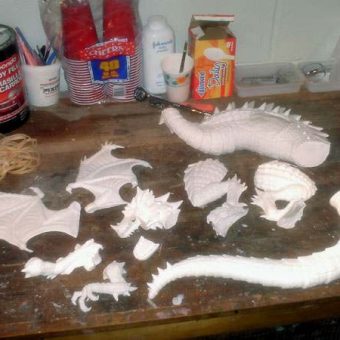
The parts are cleaned and laid out on the table, ready for assembly.
The Dragon’s eyes are placed inside the head, and the entire Dragon is assembled using steel pins and Aves Fixit-Sculpt, and placed (but not attached) on top of the base.
After the Fixit-Sculpt cures, more Fixit-Sculpt is used to re-sculpt detail and further solidify all the joints where the pieces fit together, resulting in a completely seamless, flawless sculpture that is identical to the original in every way – the exception being that the cast sculpture is many times stronger and more durable than the original clay piece, which was extremely fragile. Though the piece looks delicate, it is extraordinarily strong. I would not trust anything other than Fixit-Sculpt to join the pieces and re-sculpt detail in the piece.
The Dragon is primed with paint especially made to bond with the type of material it is made of.
The Dragon is removed from the base, and the base is realistically painted with brilliant acrylics and lacquered.
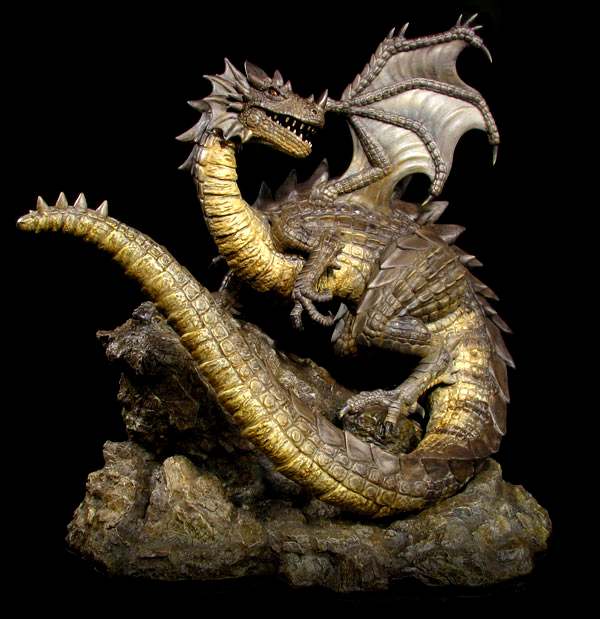
The Dragon itself is then painted realistically in accordance to the way it appears in my mind, using layers and washes of acrylics to bring the Dragon to life. The Dragon’s coloration is primarily determined by the environment and elements that the Dragon has dominion over. Vargas is an Earth Dragon, and his primary color is brown – the color associated with the element of Earth.
When the Dragon is painted, it is affixed to the base with steel pins and Aves Fixit-Sculpt, which is re-detailed and painted to make the transition into the rocks seamless. The entire sculpture is then lacquered to bring out the vibrancy of the pigments in the paint and seal the beauty of the sculpture in forever. A wooden pedestal base is added to the bottom of the sculpture, and Vargas is then ready for a high-quality photo session. The vision of this Dragon in my head is finally brought forth into the realm of reality!!