
Tutorials
The Repair of Lady Death
Dec
By: Erin Gerlach
Supply List
Drill with small bit sizes
Dremel tool
Devcon 5 minute epoxy glue
Thick and thin wire
Wire cutter
Fixit® Sculpt
Fixit® Repair putty – black
Apoxie® Safety Solvent
Various sculpting tools
Paint brush and micro brushes
ASSESSING THE DAMAGE AND PLANNING THE REPAIR
There is a saying in the building trades: “Measure twice and cut once.”
Most repair and restoration projects can be successful if the proper assessment and planning is done first. I first assess the damage for order of repair. I keep in mind which parts go where. For example; the arm goes under the hair of Lady Death, so you will want to attach the arm before you try to attach the head. Likewise the hand – you will want to attach the hand to the arm before you attach the arm to the body. This is the thinking necessary to achieve the best results with the least amount of trouble. Although not an easy repair, with the right plans, tools and supplies, almost anything is possible!
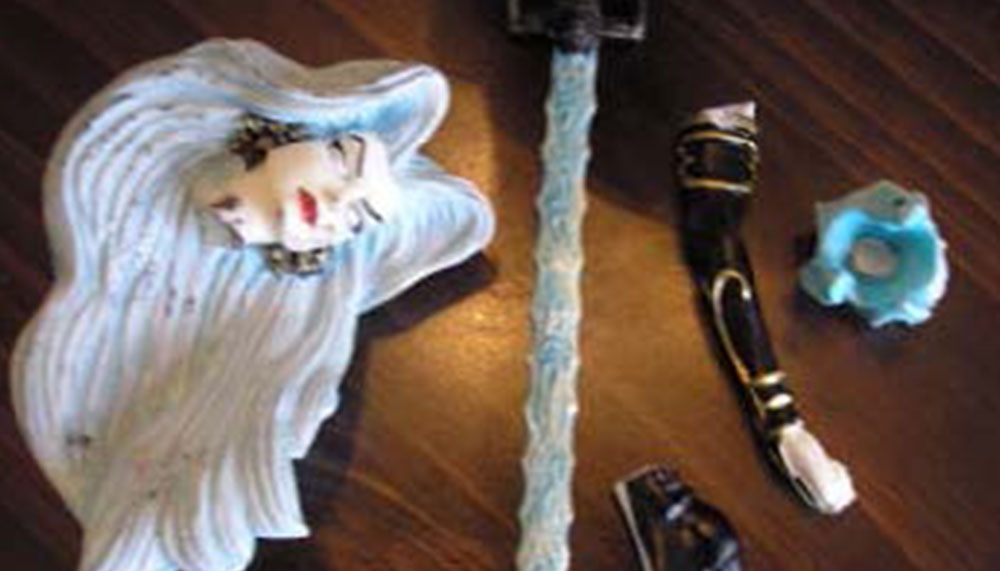
Structural Damage Assessment (pic 1, 2, 3, and 4)
Left arm broken off at bicep.
Left hand prop detached from forearm.
Sword was completely detached from the figures left hand and the base.
Head is broken off at the neck.
Both the right and the left feet were broken out and her heels were heavily damaged the base wires at the feet position were bent and wobbly, causing the figure to stand off-center.
THE WORK
The Feet
First things first: she needs to be balanced, her wires properly bent, and her feet sculpted back on. The right foot is cracked, bent and disconnected (pic 5) – but all the parts are there. On the left foot the back of her heel is broken and parts of the foot are missing, (pic 6) and the wire armature is exposed in her leg. Fixit® Black was used to sculpt, strengthen and provide the right color to match the repair. This makes it easier to just touch up instead of repaint.
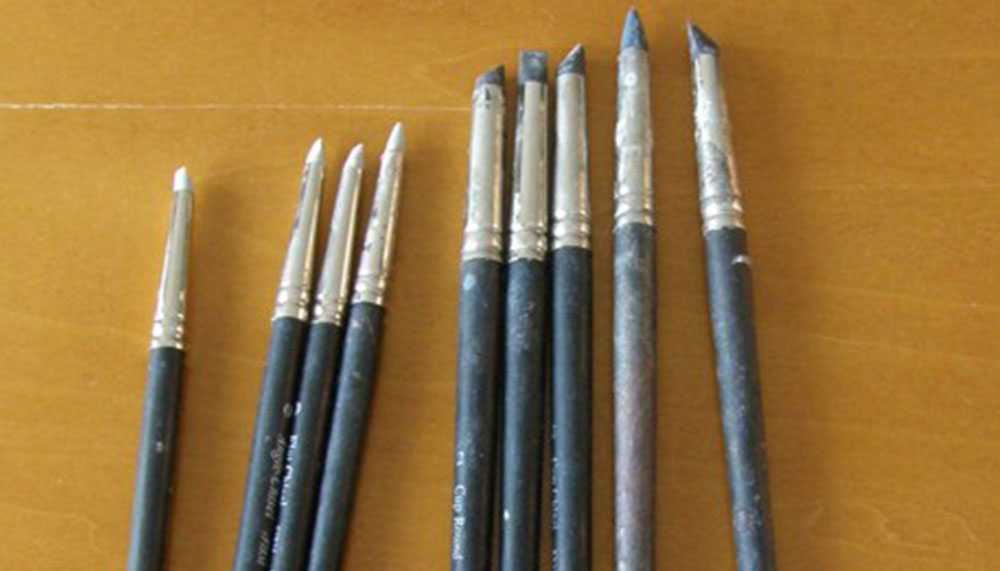
The foot repair has a lot of small, tight spaces to work around due to the huge cape that was not coming off – believe me, I tried! (pic 7-15) This is where the variety of modeling tools comes into play. I had completely forgotten about these particular tools until I needed them for this project. I picked up these excellent stainless steel modeling tools from the Tool Guy at the last Wonderfest show….awesome selection of tools to say the least. And you can’t beat stainless tools; they clean up nicely and last forever. The cape was impossible to work around without these tools. (see tools in sword repair pic 24)
Devcon 5-minute Epoxy Glue was used to temporarily hold the wires in place so I could apply a bit of pressure when positioning them back in the feet. Fixit® Black was used to cover the exposed wire seam, and the gaps and chips in the shins. I used a Dremel tool with a grinding bit to make the foot’s wire slot wider and deeper so when filled with Fixit there was more room for it to seat the wire and not push the foot into an abnormal position. The fit was nearly perfect. After fixing the wires and repairing and rebuilding the feet, I smoothed in the detail using Apoxie® Safety Solvent.
The Hand
The hand repair was very easy. I put in a small pin for support by drilling a small hole, then I used 5 minute epoxy to set the pin. Fixit® Sculpt was used to sculpt around the hand, making it a seamless repair. (pic.16 & 17)
The Arm
The arm needs two pins. If only one pin is used it can spin; two pins stabilize the piece. So I start by drilling two holes into the broken-off arm. (the same method is used to repair the head) I cut the pins and then match up the other side using a marker to make dots so I know where to drill on the other side. (pic. 18, 19, 20)
The outer arm is a good guide because of the arm band detail, which also needs a bit of sculpting work done to it. Once I have the arm matched up, I mix up a small batch of the 5 minute glue and set the pins in the detached arm first. Once the pins are set, I test fit again to make sure the glue didn’t run and leave an edge. Before I glue I make sure I know what I am doing with it and where it is going, so test fitting is very important. You should be really careful to clean up excess glue before it sets. That is why I choose a 5 minute set epoxy glue, which gives me enough time to clean up and move things around if I needed to. I then mixed a bit of Fixit® Sculpt using it to make a small rim around the arm (like an o-ring). I then mixed another small batch of the 5 minute glue and dipped my pins in it before sticking them in the arm holes. The Fixit® Sculpt will squish out of the seam which I use to cover the repair and re-sculpt the arm band.
The Head (pic 21 -24)
I also needed to drill two holes in the head for proper support (like the arm, see pic 18). I used a thicker wire and tested the fit, and then matched up and marked the spot for the pin holes on the reverse side. I went about ½” deep in each half, so the wire support was a total of 1”, giving it the needed extra strength, as she has a really heavy head with all that thick wavy hair. In test fitting, I decided to grind away parts under her hair giving it a better fit by her shoulders. The cape again created some issues because it is really only connected in at the base of the model, while the rest of it just rests on her shoulders and moves around. I tacked this down at the base with Fixit Sculpt, then taped it to hold it till the Fixit Set– it doesn’t move anymore!
I again used 5 minute glue for setting the wires, then a test fit, more 5 minute with a nice rim of Fixit® Sculpt on the rim edge of the head’s neck piece before squishing it down. The Devcon allows it to set quickly in place and the Fixit will still cure in the 24 hour time frame it’s supposed to. Using the Fixit in this way gives the kit a lot of extra strength and fills in the seam all in one step. Now all I had to do was fill in the break at the base of the neck and cover the seam that resulted from attaching the two parts together at the neck line. I finished by feathering the Fixit with Apoxie® Safety Solvent to make the repair virtually invisible.
The Sword
The sword already had a pin/wire in it, which was helpful. I sanded around the sword wire to expose it a little more before I applied the 5 minute epoxy glue. The sword literally snapped into place. I followed this by applying a seamless edge of Fixit® Sculpt up under the hand and down on the base of the sword, and I added Fixit to the skull-head to make sure that it stays put. (pic 25)
WRAP UP
The Fixit® Sculpt made this project a huge success. (pic 26 & 27) It matches the skin tone and texture of this figure really well. It was incredibly easy to smooth, much like butter. Light sanding was hardly needed, but I did go over the seams to allow for an easier professional-looking paint job.
The point of a restoration or repair is to make it appear as though it had never been broken in the first place. With a little practice and planning, you can effect the invisible repair and make the piece stronger overall at the same time, which makes it less prone to future breakage.
Remember, if you have something that is broken …. “Don’t toss it, Fixit®.”
Questions or comments about this repair, I am happy to hear from you, send an e-mail to me at: aves@avesstudio.com
Hello
I’m new to Apoxie, haven’t tried it yet. Need to get all the facts first and the only question I have about Apoxie is, can I add more Apoxie to a cured project or does it lose its adherence?
YES – Apoxie Sculpt and FIXIT, FIXIT Sculpt, Super white Apoxie AND Apoxie Clay – all adhere to themselves AND each other in ANY stage of set up.