
The Bee Project
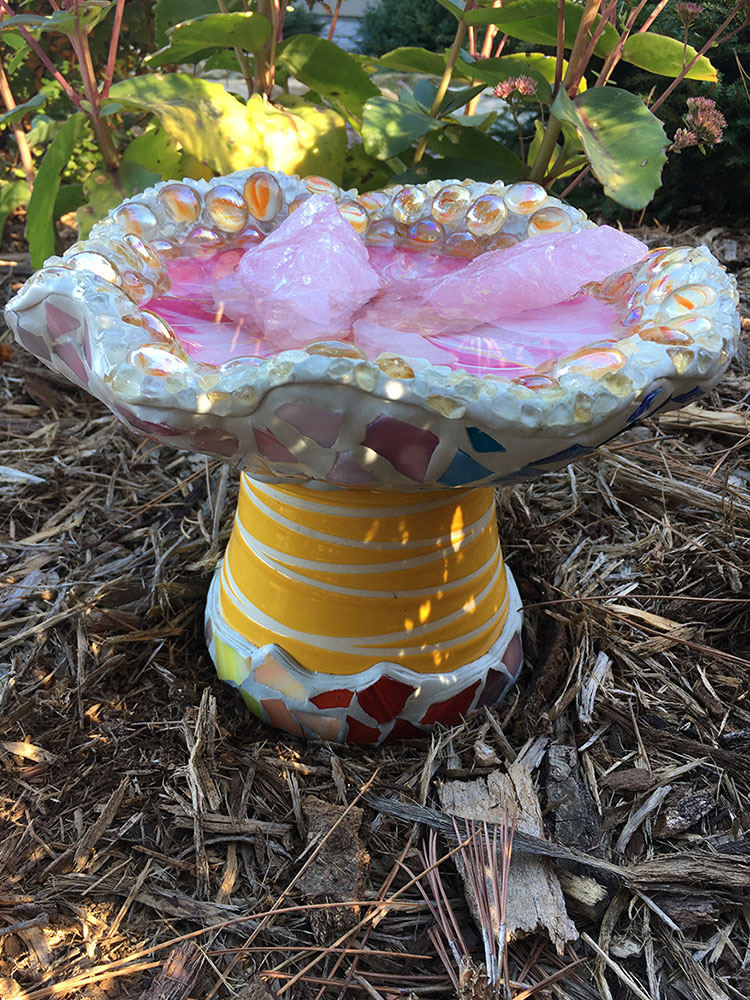
Bee & Butterfly Basin
Oct
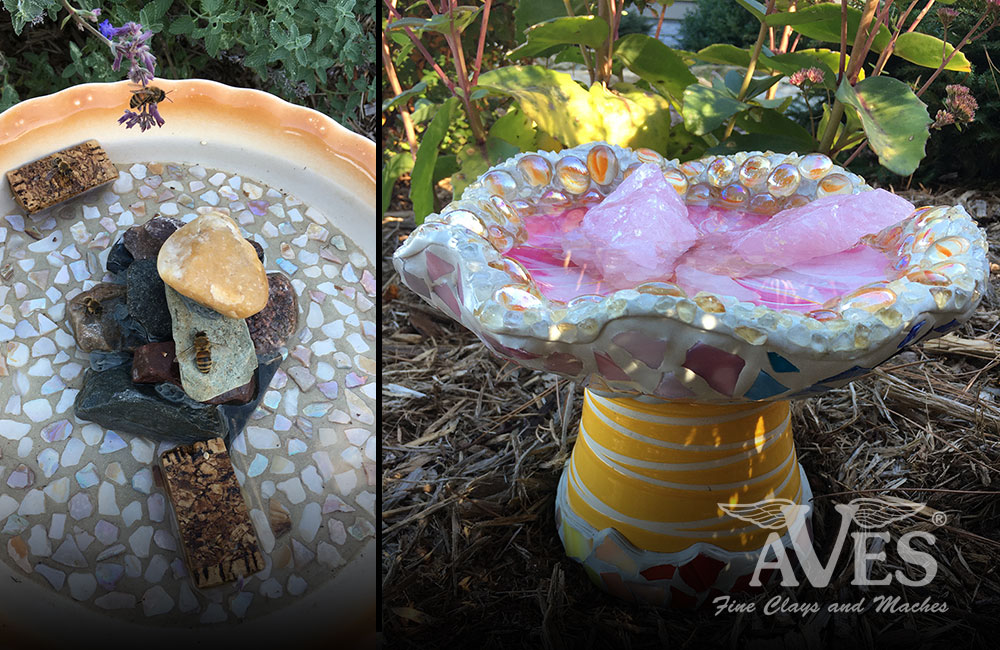
Bees face many threats today including; drought, loss of forage areas, and colony collapse. There are many ways to help the bees; creating bee-butterfly friendly flower gardens in our yards but you don’t have to become a back yard bee keeper to help the bees or environment ; ) You can help by avoiding pesticides and other chemicals on your lawn, donating to organizations that work to protect the bees and other pollinators, purchasing local honey & products from your local bee keepers, AND by placing containers of water in your yard so thirsty bees can get a drink…. BUT there is a little catch you should know about leaving water out for the pollinators…they have to be able to get to it and not drown! SO Today I’m going to show you how to make a pollinator friendly basin using a pie plate and a recycled ceramic pot into a work of functional art that is sure to bring pollinators right where you want them and help avoid areas where you don’t ; ) This is also going to be really spectacular looking where ever you end up placing it ; )
I love to repurpose, upcycle and make functional art because recycle, reduce, reuse helps everyone, and it’s just fun to make art like this….so that is what I will use for this project. We’re going to use a ceramic pie plate; a stone pie plate or shallow dish of some sort will also work great, or a former bird bath top.
*Pick a ceramic or stoneware shallow dish to be your basin – (avoid glass as it can be a real problem if it gets knocked over by an animal and broke in your yard). The shape is not important as long as it can hold few inches of water and cover your base. We will be adding a base that will keep it off the ground.
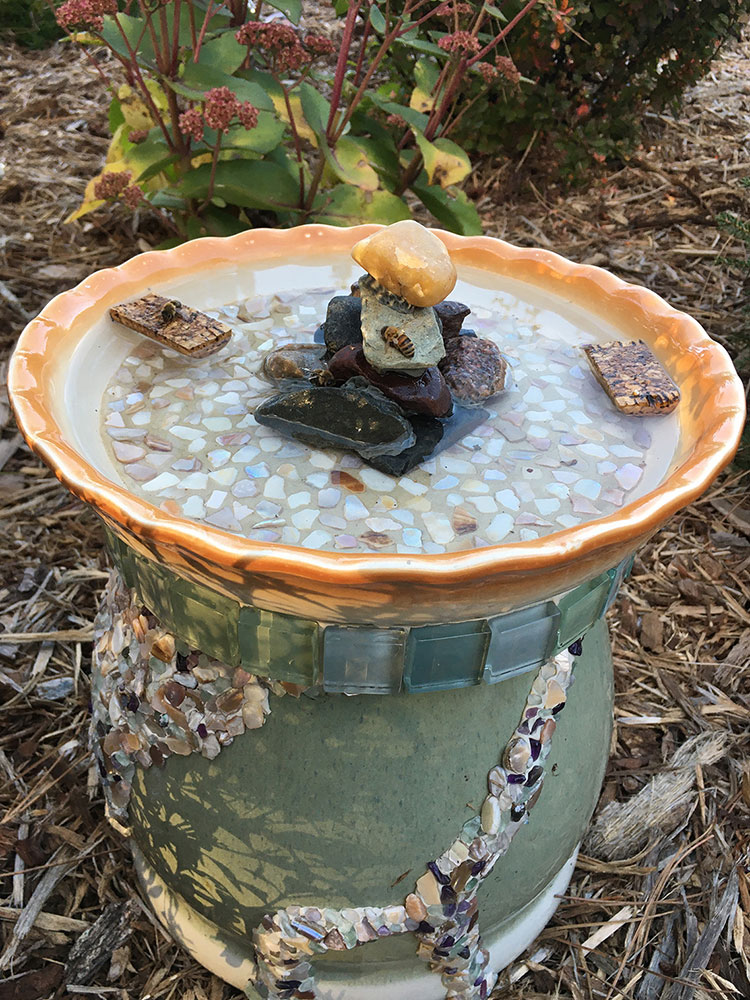
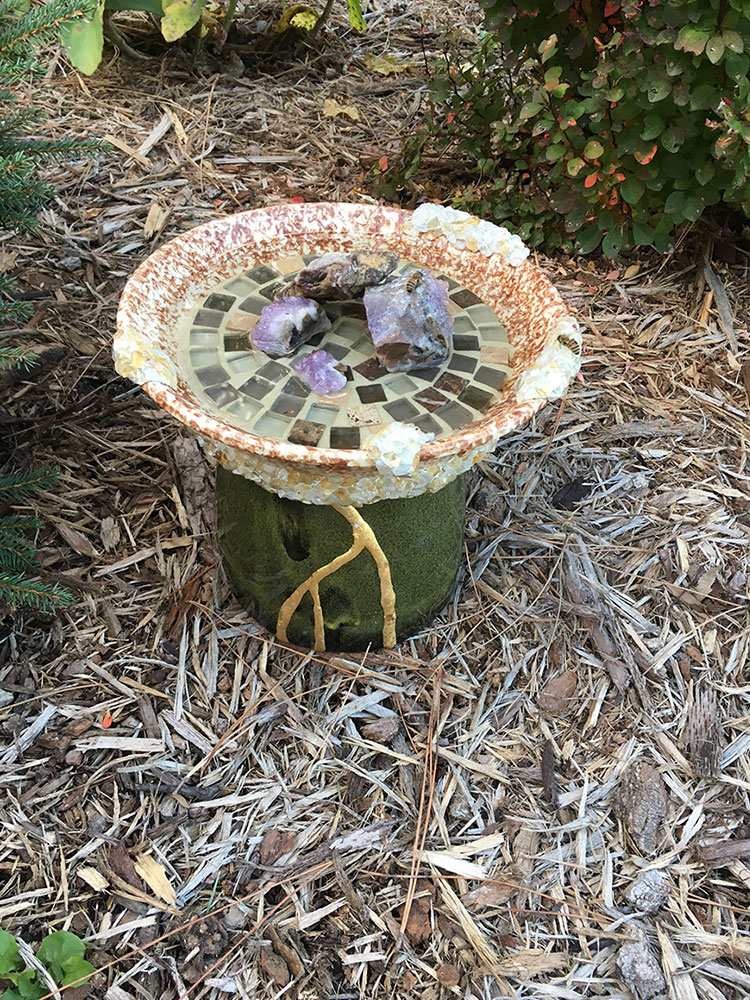
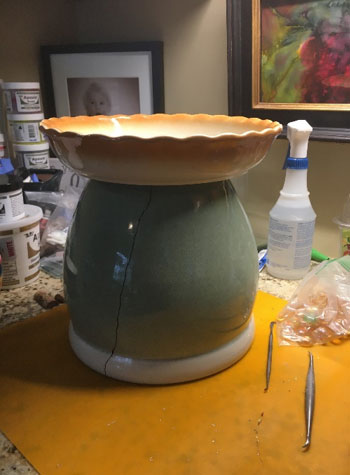 *Find a base…that supports your basin top, it really could be anything you want it to be. I’m using a recycled ceramic pot that we will turn over and use that for our base, you want it nice and sturdy, not easy to tip over. Test fit your basin to your base. You can choose to adhere your basin directly to your base or make the basin removable for easier cleaning.
You can make this piece decorative and functional in a variety of ways…. we are going to use an adhesive water proof epoxy clay to embellishing blobs or around the edge of the bowl with some crushed rocks. Expand on that idea by adding texture with stamps/press molds such as adding leaves, vines, mushrooms, anything you like using a press mold to your basin or base. FIXIT Sculpt is highly sculpt-able so if you wanted you could sculpt something. I’m going to keep it simple by embellishing with shells and rocks, however you can incorporate found objects or anything that is able to be left outdoors and safe for bees and other pollinators: rocks, marbles, tiles etc. I’ll also walk you through how to create a removable basin top for easy cleaning by adding a ring to the bottom of the plate to hold it into place!
If your pot is broken or chipped – now is a great time to repurpose it – and you can catch the next episode of make it artsy to see just how to do that and make it look really artsy and ready for outdoors! *** Check out the next episode on Make It Artsy to see how I repair and artfully restore broken pots! **
Ready to mix FIXIT Sculpt?! Okay Let’s do this!
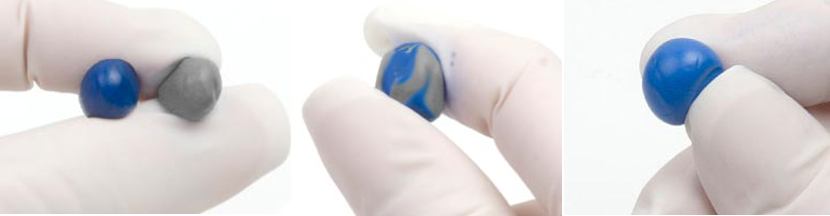
Wearing gloves: Measure equal parts A and B FIXIT® Sculpt. Mix & Knead together for 2 minutes until color is uniform and it feels a little warm in your hand. (this is your signal for epoxy activation!).
*If you are making this one solid piece: simply apply the FIXIT as desired to your base top, you can roll it and apply in a coil or just pancake it on there – you want enough clay to grip the basin top ~1/2” thick is good. Press the basin top down on the base. You can now continue to decorate that connection joint as you like or simply leave it to cure. (see picture to the left) Skip the next few steps, your ready to make this artsy!
*If you are making the pie plate/basin top removable: we need to form a ring to fit your top & base together. Add a piece of Ziploc bag to completely cover your base top and a good inch or two down the sides as well (tape it down). Roll out FIXIT to make a long thick tootsie roll I use about 1” roll thickness.

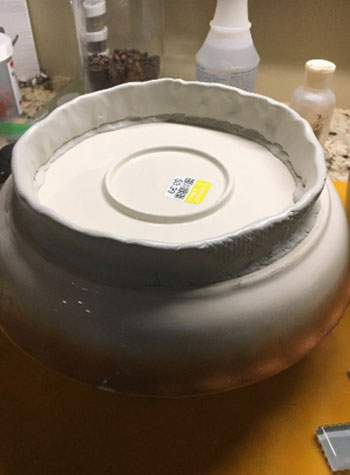

Before you apply the Fixit test fit and it may even help to mark where your top and bottom will connect so you know where to apply the clay to form seated ring. You want a fairly tight fit. Apply to the underside of your basin top appropriately. Work the clay into the desired shape and height (~ 1” tall & ¼” thick) smooth it out a bit with some water. Do a test fit over the plastic of the base press it down for fit form/shape as desired to seat that fit. You can allow your basin ring to cure on the plastic just like that if you are happy with it. You can make it look pretty after the ring cures. (recommended 6 hours or overnight).
Remove your pie plate/top from the plastic, decorate the outside visible area of the ring by adding more Fixit Sculpt and embellishments that are able to be outside – we are using tiles. Mix more clay according to #3 and apply as desired – you can also apply more clay and texture it with a rubber stamps even a rock, or tree bark works to texture – (mist the stamp with water press into the clay and pull off). The possibilities are really wide open. Apply the clay as desired use press molds or just embellish – anything that is safe for bees and outdoors will stick into this clay or feel free to get sculptural.
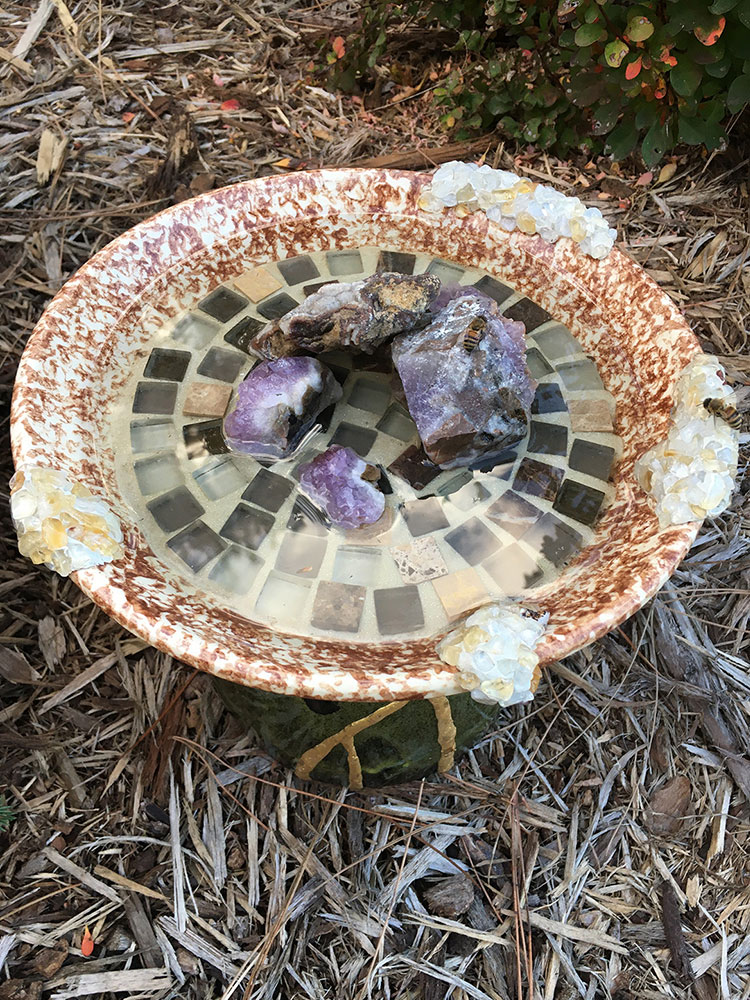
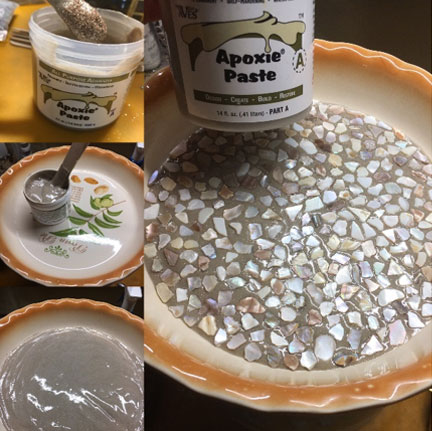 Moving to your pie plate/basin top – If you want to cover words, or make it decorative – you can do this with more FIXIT Sculpt as you wish or use a product called Apoxie Paste…mix and pour according to product package directions (add a colorant or super fine glitter if you like), smooth this into your basin bottom. Embellish if desired with material such as crushed shells, marbles, stones, mosaic glass, tiles etc. you will need to let this product cure before you can continue. At least 6 hours or overnight.
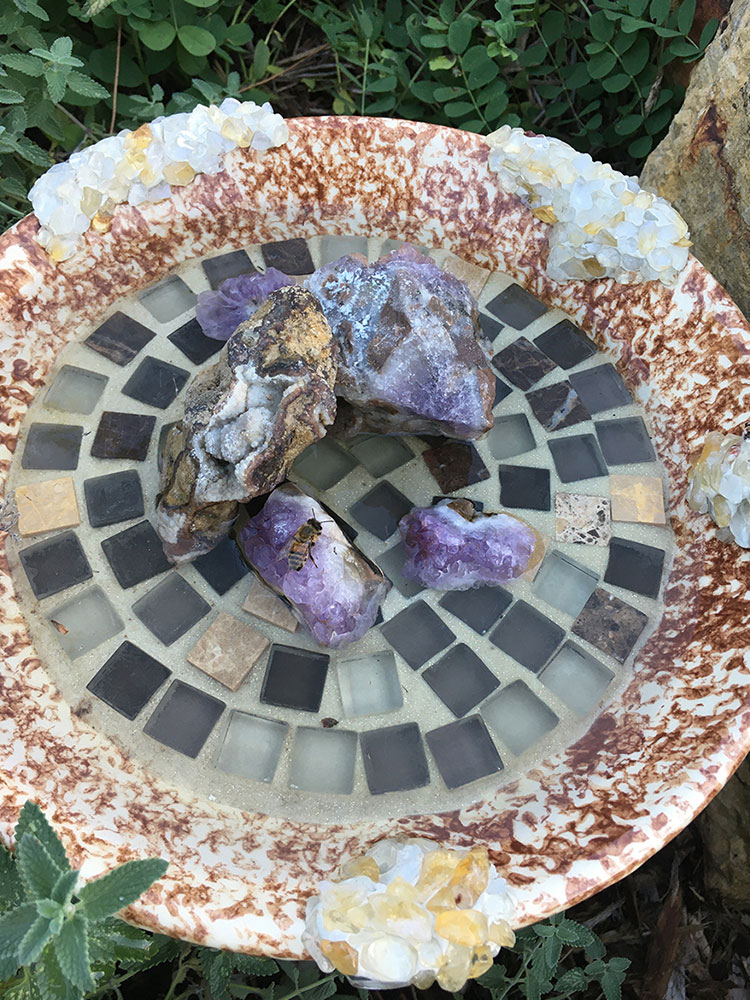
Now it’s time to make it safe for the bees so they don’t fall in…you can do this a variety of different ways…build up blobs in the bottom to make little rock islands for the bees to climb on, could make some steps going around the inside of the basin – float cork, burlap, sticks, or spread rocks on the bottom ….or build a rock tower that you can just pull in and out and won’t get knocked over by a bird or other animal….you could even add a rock tower to an existing bird bath to help the bees not drown!
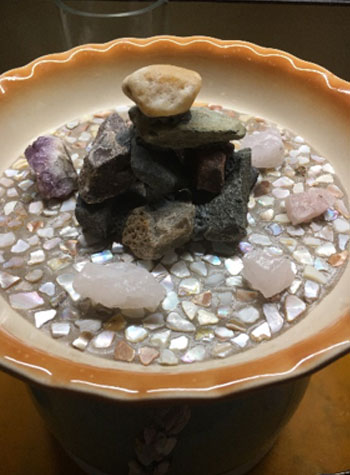
Pre-stack your rocks so you have an idea of what your trying to make…mix more clay, roll an appropriate size ball about (marble size) and place between each rock you want to stack up. Press and smoosh the clay into the rock joint. The tower should be something they can climb on and spread a bit throughout the basin (like a pyramid).
*FIXIT Sculpt sticks to itself in any stage of set up. Have fun with it.
Use Aves Safety Solvent to remove any unwanted FIXIT residue on your rocks/tiles glass before it cures.
*Let your project sit for 24 hours to fully cure.
*Aves Clays (Apoxie® and FIXIT®) are waterproof and safe to use in or out of an aquarium so it’s not a problem that it gets wet and its safe for pollinators and other animals.


Supply List
Ceramic or stone wear Pie plate or similar
Medium size, Ceramic flower pot
Ziplock bag
crushed or polished rock…amethyst, citrine, turquoise, mixed colored natural stones
Nitrile disposable mixing gloves
Aves FIXIT Sculpt, Aves Safety Solvent, Butterfly T-shirt Erin is wearing:
Stone source: Crystal rock
Amazon: SUNYIK Tumbled Chips Stone Crushed Pieces Irregular Shaped Stones
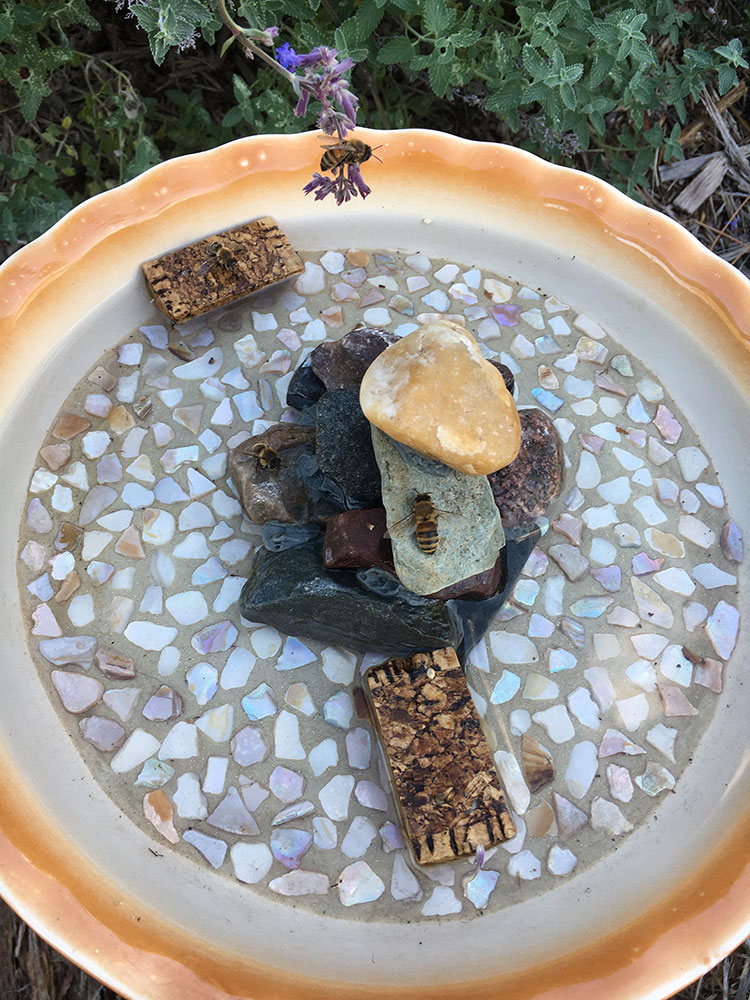
Its important to have cork or sticks in the water so if the bees do fall in, they have something to grab on to and get out. I use halved wine corks to achieve this, also great choses: colorful marbles, stones, sticks, burlap etc.
Be sure to keep your basin consistently filled with water – bees add water/drinking locations to their flight pattern when they find a water source they go back and tell their friends doing a waggle dance. When water sources go dry the bees look elsewhere for constant water sources – this may be why many people are unable to attract pollinators!
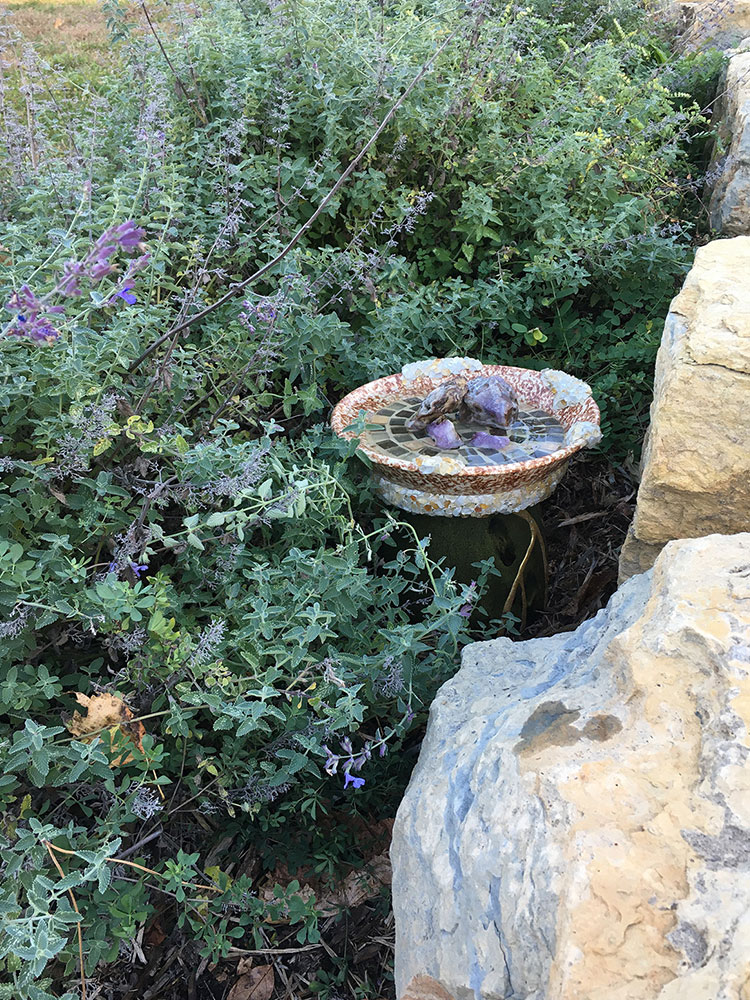
Location of Basins: you will not want to keep your bee basin where you do NOT want to attract bees – I would not recommend putting these on a small porch…best to place in a garden corner or somewhere the bees will not bother people, again water sources become part of their flight pattern so high people traffic zones should be avoided. Place where you want pollination – these will also attract butterfly’s!
Bees and Butterflies are attracted to certain colors – use colors that match your needs, this will draw them into your basin 😊