
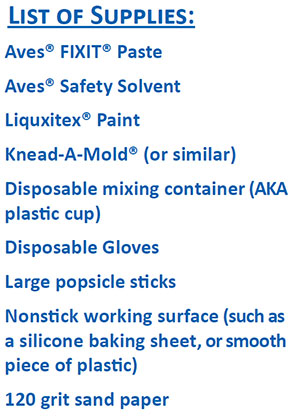
Repairs and Restoration
Sign Repair “H”
Sep
 I like to start my articles out with a little history and special details about the piece I’m working on.
A gentleman contacted me asking “Would any of your Aves® products be suited for this repair? Can you suggest a repair method?”
The answer to both questions was yes.
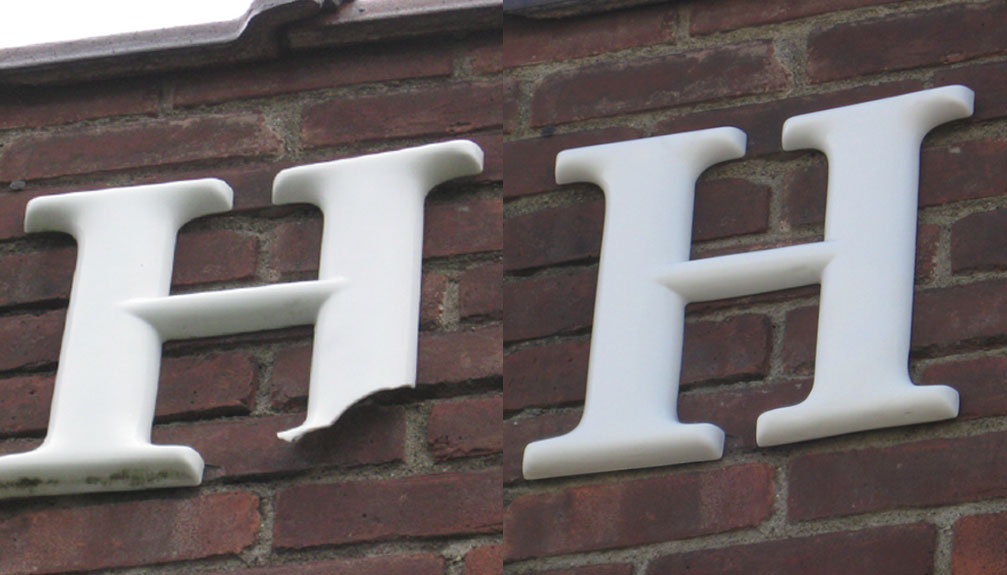
This is a 40 year old broken sign letter “H” that needs repaired. It is approximately 12” tall and made of an 1/8” thick white(ish) plastic material. The sign company said this font is no longer available and the replacement cost was quite high to get a letter that didn’t even match! The gentleman turned to Google for repair material options and that’s how Aves products were found. After the repair process was discussed and he had mentioned he didnt have allot of time to repair this himself – I offered to save the guy both the time and money to do the repair in house. It looked pretty simple to do, and I was confident a full restoration could be done for 1/3 less the cost of the mismatching letter. A little over 2 hours of total working time (minus the curing time), and lots of photos to detail the process.
SO how do you do this? What do you use?…I’ll take you through it step by step. Note that there are a few
different ways one could have gone about this repair, this is not the only way to repair this item with Aves® products (part of the real reason I use them is that they are so versatile!) it needed to look really good and match the plastic material it was made from so it had to be smooth, with a seamless transition, and minimal sanding to save time.
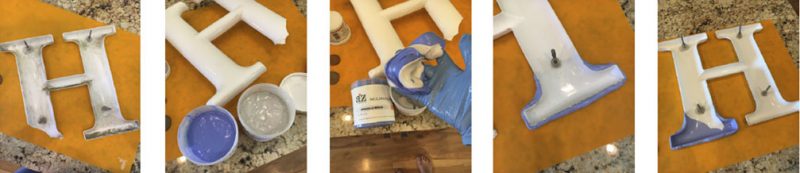
Always start with a debris free surface, the “H” was washed & scrubbed with dawn dish soap. Next assess
your color so you have everything ready to pre-color or even avoid coloring if that’s an option….I thought for sure I would use Super White Apoxie Sculpt for its color and simply hand form & smooth it right onto the missing leg of the ‘H’ (I mentioned there were other ways and Aves product you could use to do a project like this) but I didn’t want to form it by hand and have allot of sanding, and more importantly I wanted it to be really light weight….. I decided to make a quick mold off the other side of the “H” – and recast it right over the missing part of the letter…..this is the perfect use for Aves® FIXIT® PASTE. I used a product called Knead-A-Mold® (super cool product that you can use to cast just about anything in minutes, makes great texture flat stamps too if you have a texture your trying to replicate plus it works excellent with Aves® products, no release agent needed!) simply mix the 2 parts together, cupped it around the good foot of the ‘H’, waited about 10 minutes and that quickly I had a flexible mold that was ready to cast in.
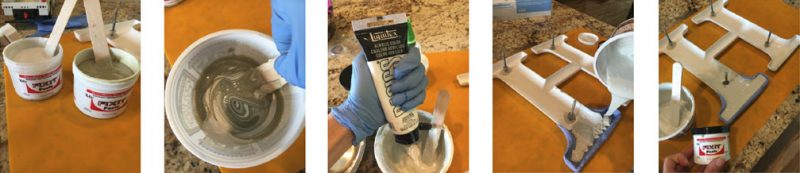
I fitted the mold to the missing side, mixed up some FIXIT® Paste, thoroughly mixing parts A + B together
vigorously (*TIP: I like to mix FIXIT® Paste in a disposable cup because when the part A and B are activated the outside of the mixing container will get a little warm and that signals to me its mixed and ready to go), then adding some titanium white Liquetex acrylic paint (it’s what I had on hand) it works just fine but it’s sort of gooey which reminded me why I dislike using acrylic paints as added colorant … next time I will be sure to grab Liquxitex OIL paint (any brand of oil paint from a craft store is fine to use). I poured the paste into the mold, pushed it up & smoothed it into the upper part of the letter using Aves® Safety Solvent and a gloved
finger, then let it cure in the mold over night. You may notice I didn’t use a mold release for this project
because FIXIT® Paste doesn’t adhere to this type of silicone/rubbery flexible mold.
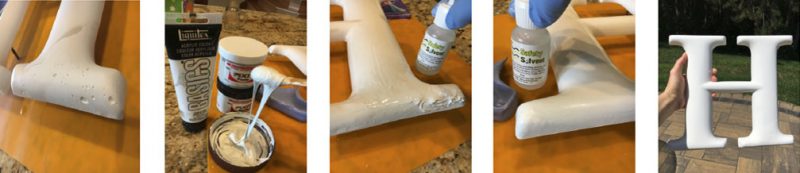
The paste cured nice and hard overnight … I can remove it without worries and continue work on it. Mixing more FIXIT® Paste and paint to fill pin holes using the same mixing process described above (pretty normal when you use a mold that you see some air pockets – tapping helps that during the cure time, but I had kids to attend to so that part didn’t happen, no worries more FIXIT® Paste to the rescue.) FIXIT® Paste is really a neat product, I love how it will adhere to itself in any stage of set up making filling these pin holes super simple
to smooth over, nearly seamless. You can see that I covered most of the front side of the letter again to blend it with the existing plastic material (which gives it more strength at that connection point too, not that I was
concerned about adding strength because this stuff is super strong when it cures, it’s not coming off) and achieved a seamless transition again using the Aves® Safety Solvent (also excellent for cleaning this paste
up from my tools, and working surface) I let it cure for another 12 hours and finished it off with a quick light
sanding to the edges and any spots that needed it using 120 grit sand paper. I opted not to seal it or paint it because FIXIT® Paste is UV resistant, waterproof & weatherproof thus I didn’t feel it was necessary, I left that up to the customer to do once he received it back. FIXIT® Paste made this repair really easy and I was able to
successfully restore this sign letter in short order. And that’s it! Hope you enjoyed this article.
Until Next time – keep on designing, creating, building & restoring.
Closing Customer Remarks
 “I’ve been working on this building, inside and out, for the past 10 months. I know it isn’t anything flashy, but I feel like a proud father, and your repair was the icing on the cake. NOW it’s done and ready to sell. The place is going on the market this week. Wish me luck. By the way, I decided not to do any polishing or clear coating; it
really wasn’t necessary. It was installed just as you sent it. Thank you again.”
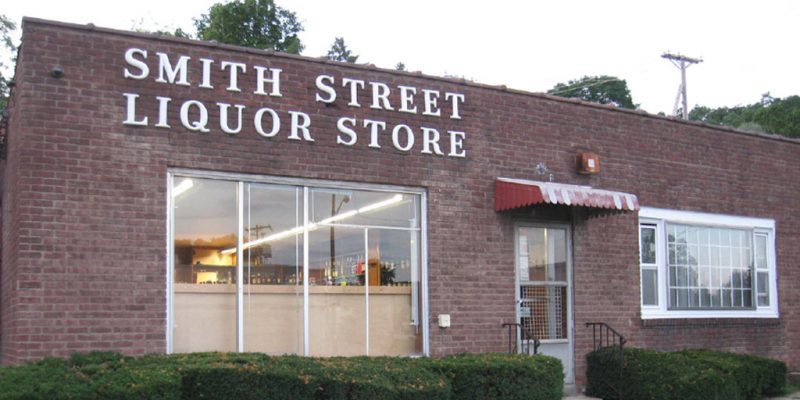
Customer, Poughkeepsie, NY